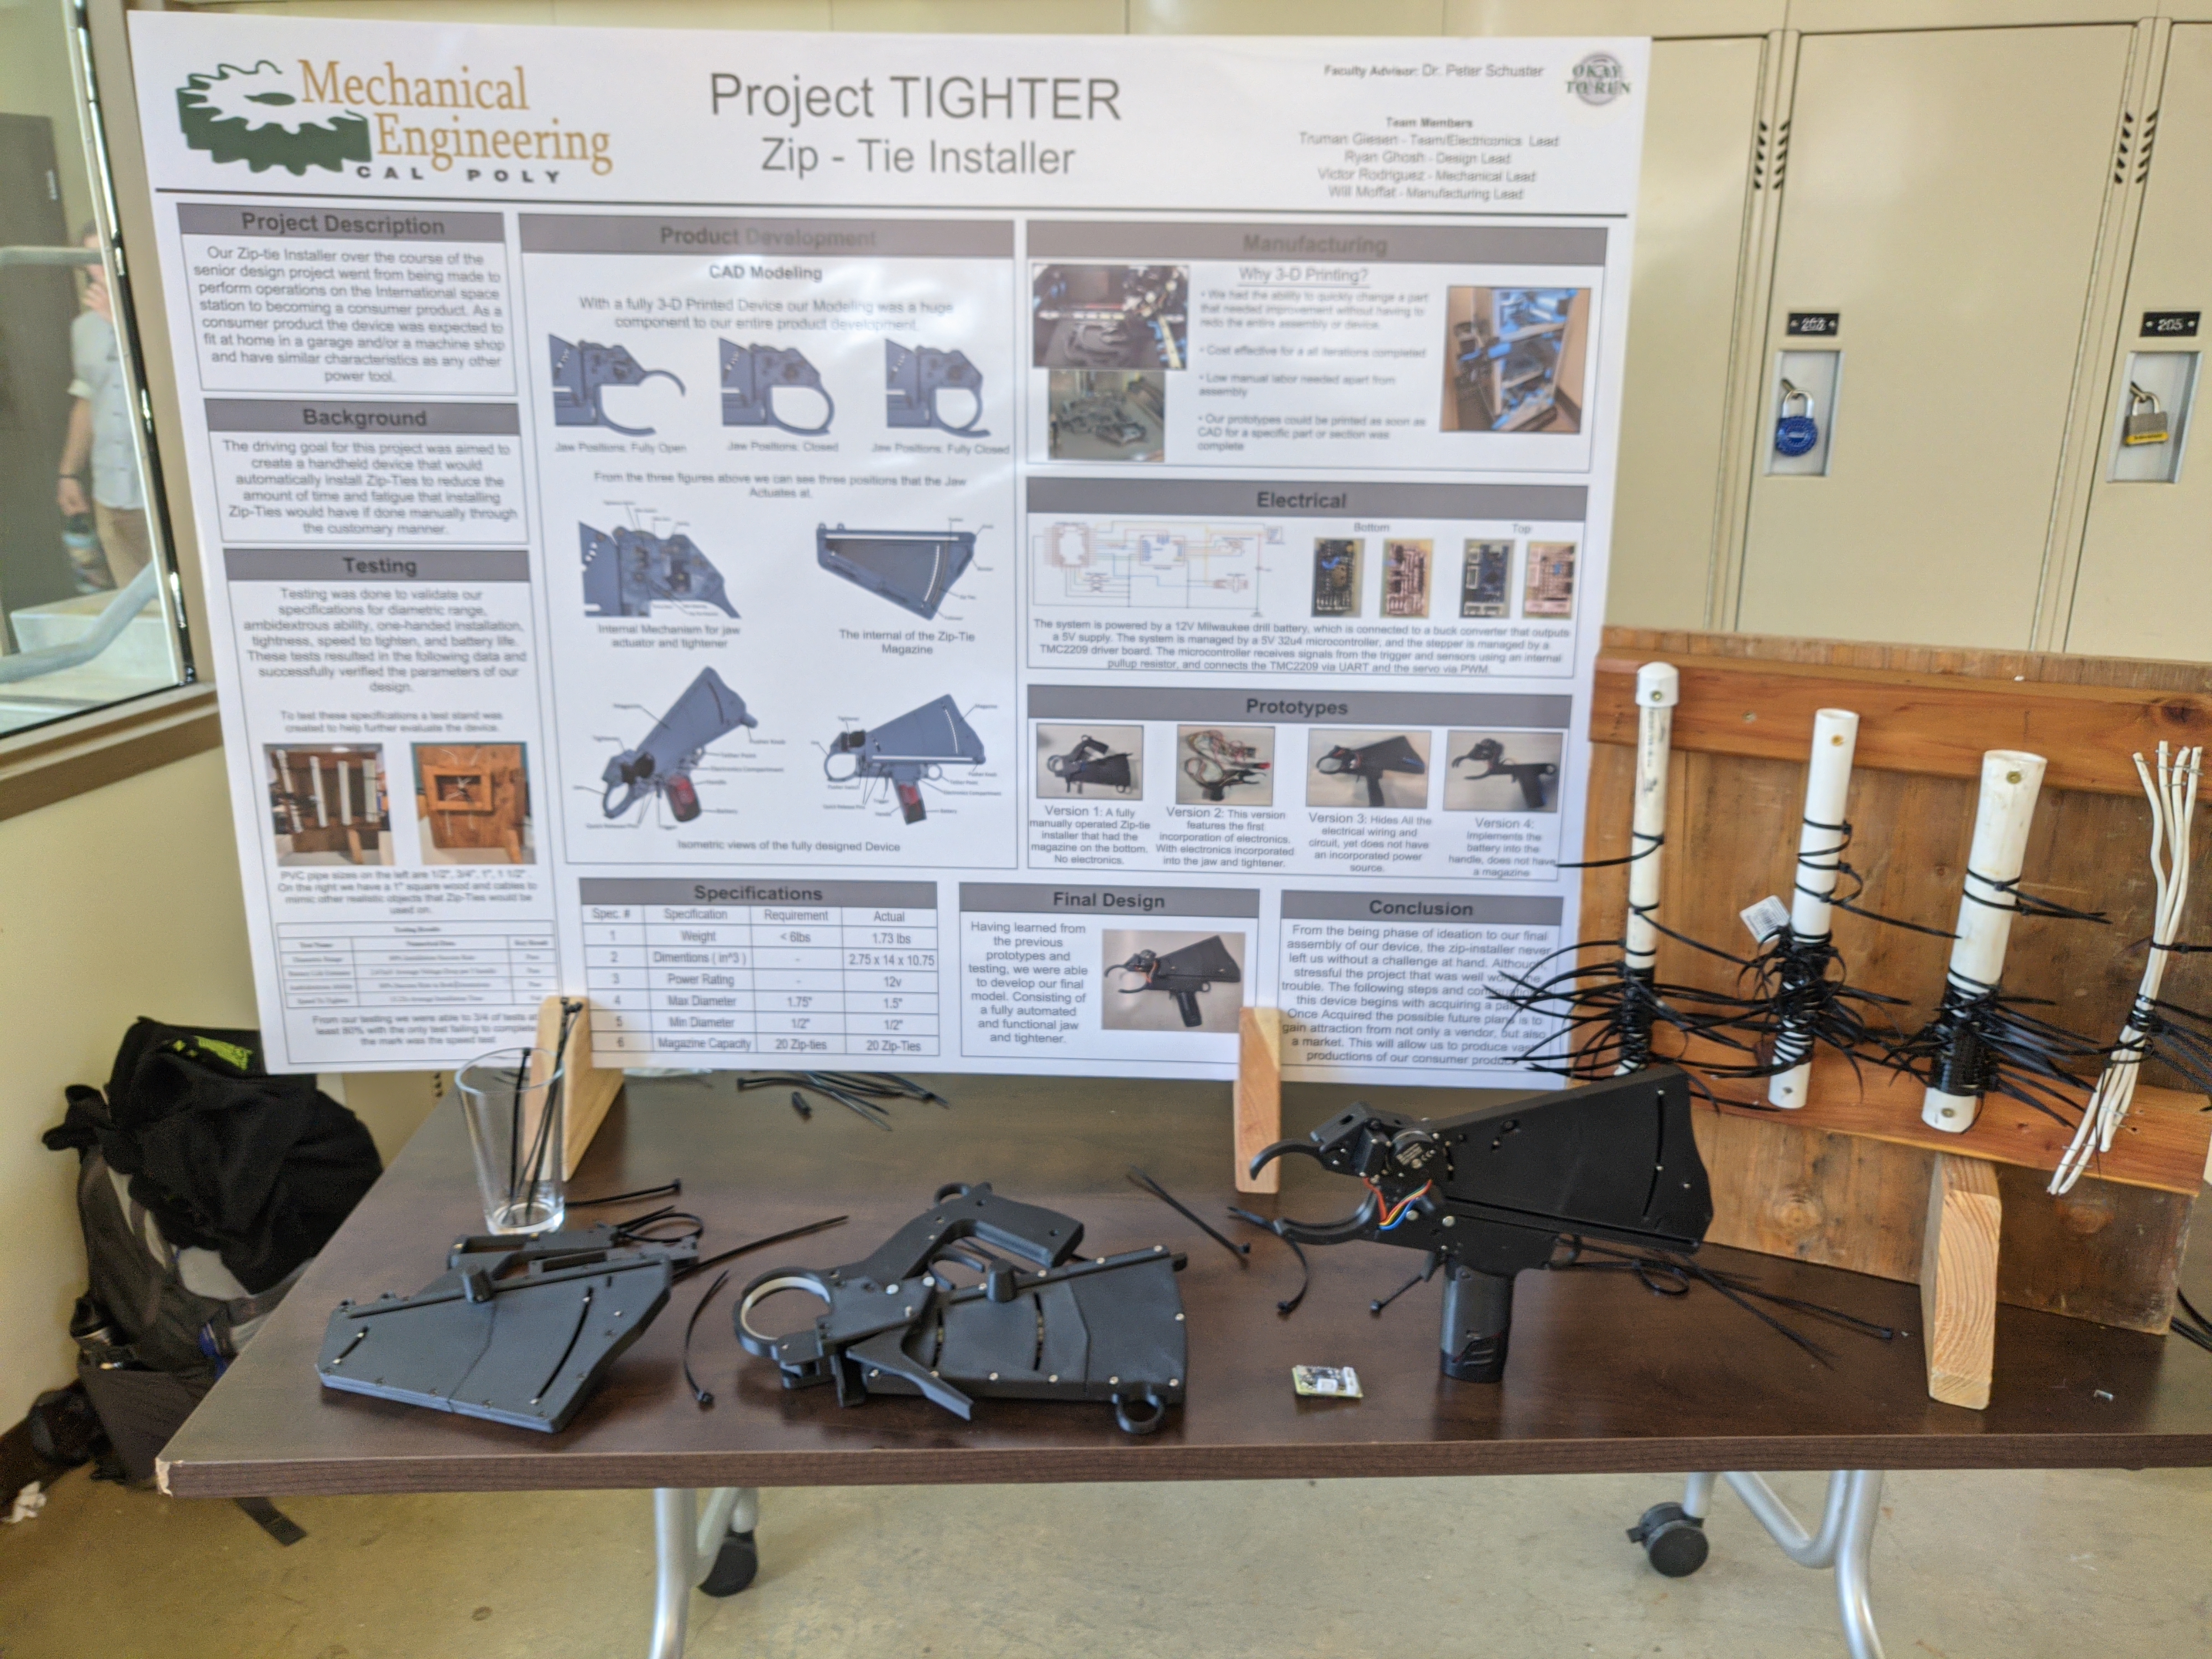
Zip Tie Installer
For my Mechanical Engineering senior project, I was the design lead in a team of 4 for developing a low-cost, rechargeable handheld device for automated zip tie installation.
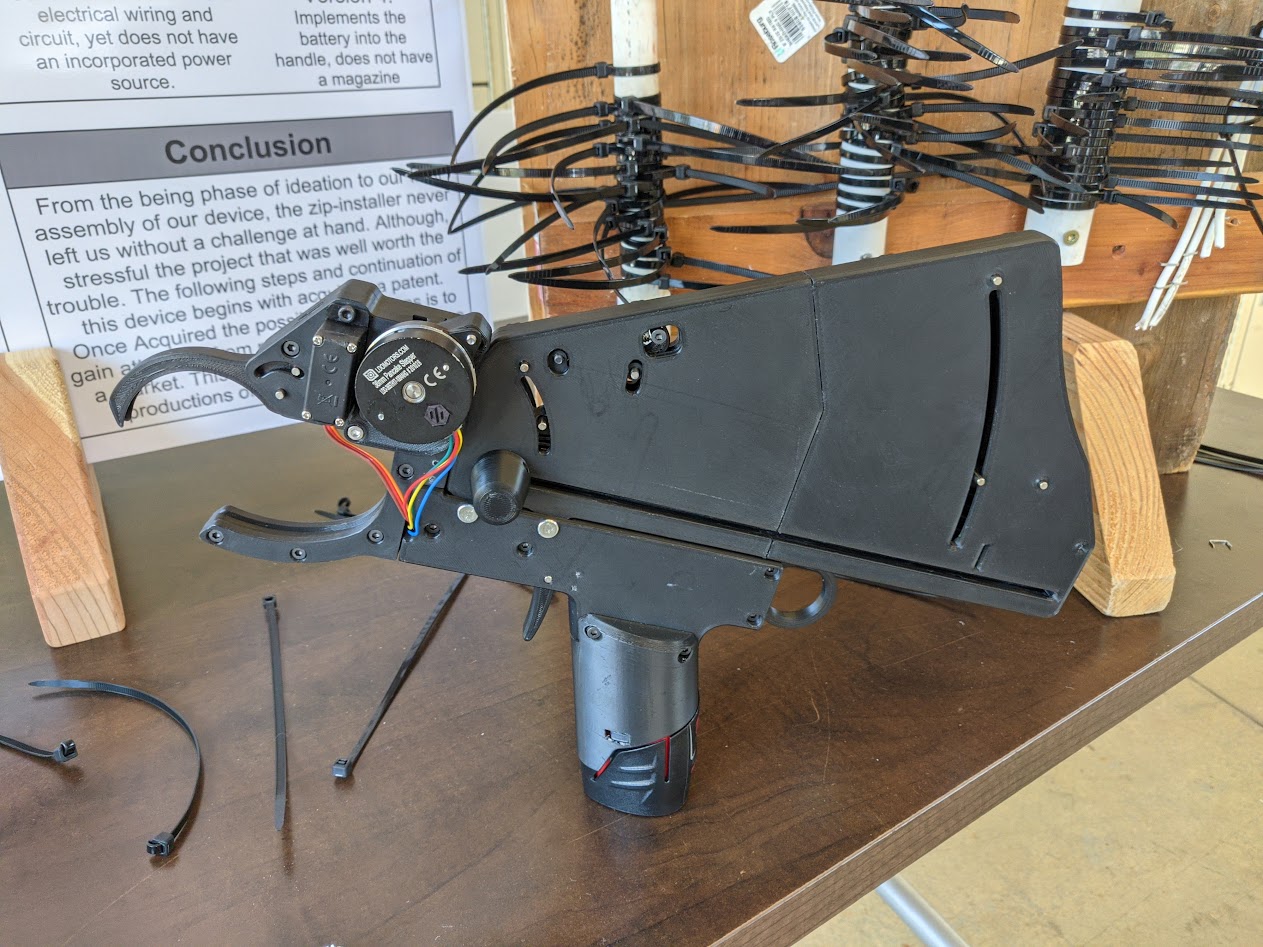
I utilized SolidWorks to create the CAD model and 3D printed custom parts using my K3 printer. We iteratively prototyped, tested, and refined the design, culminating in a successful demonstration at the senior project expo.
Demonstration
In the following video, my teammate demonstrates how to use the zip tie installer:
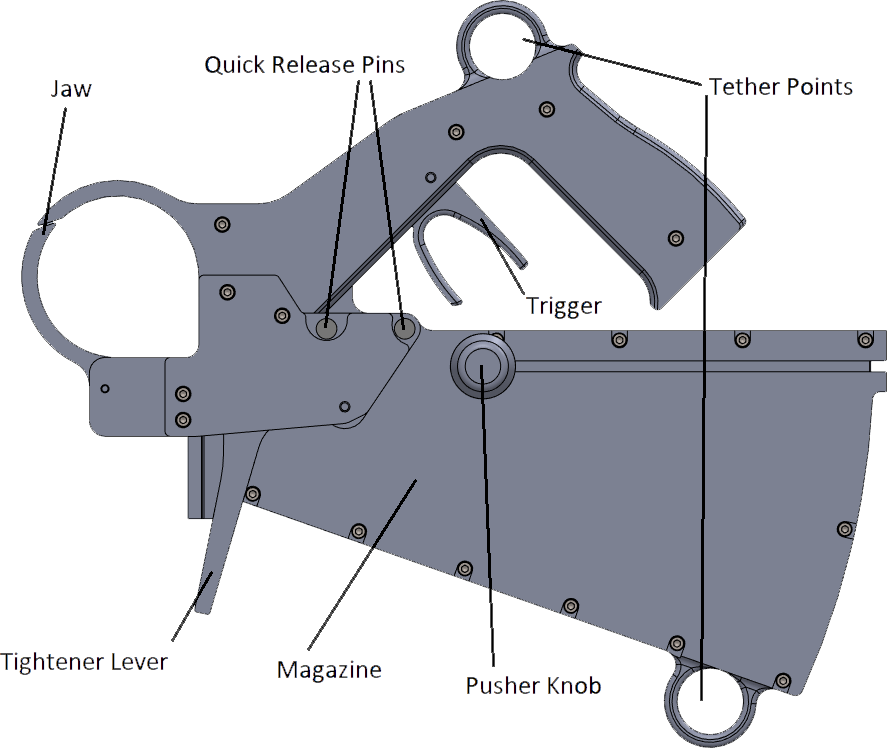
CAD
I used SolidWorks to create the CAD model for the zip tie installer. We iterated on individual parts several times, but the main 3 revisions of the overall device are shown below:
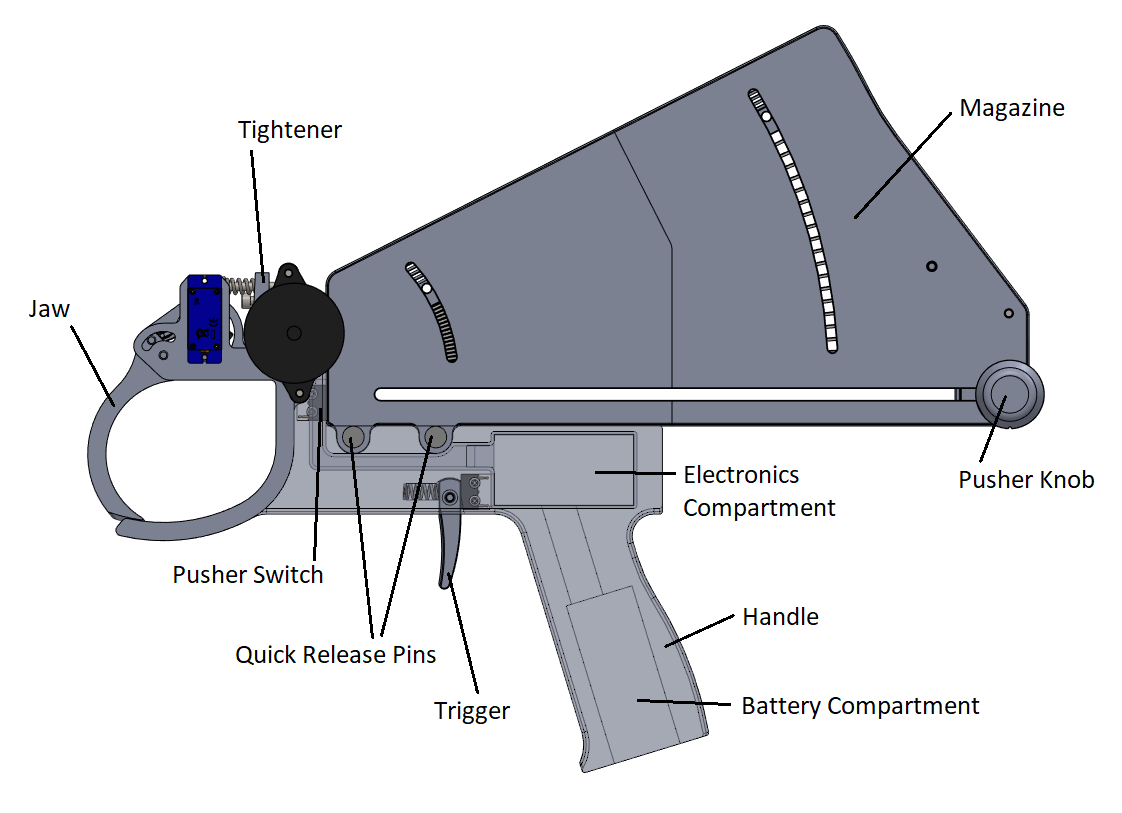
Full assembly: V1
Full assembly: V2
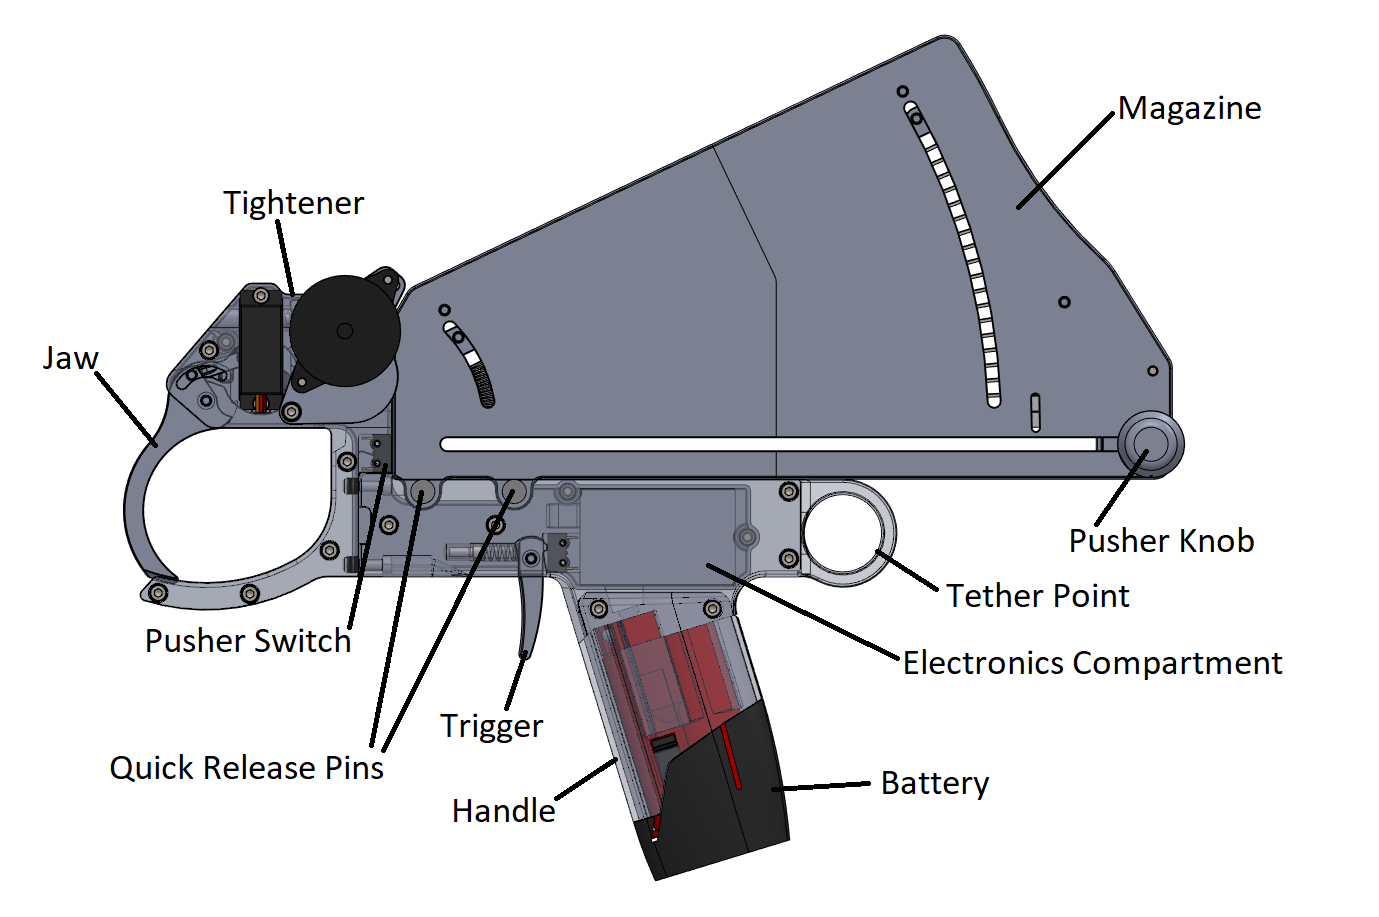
Full assembly: V3
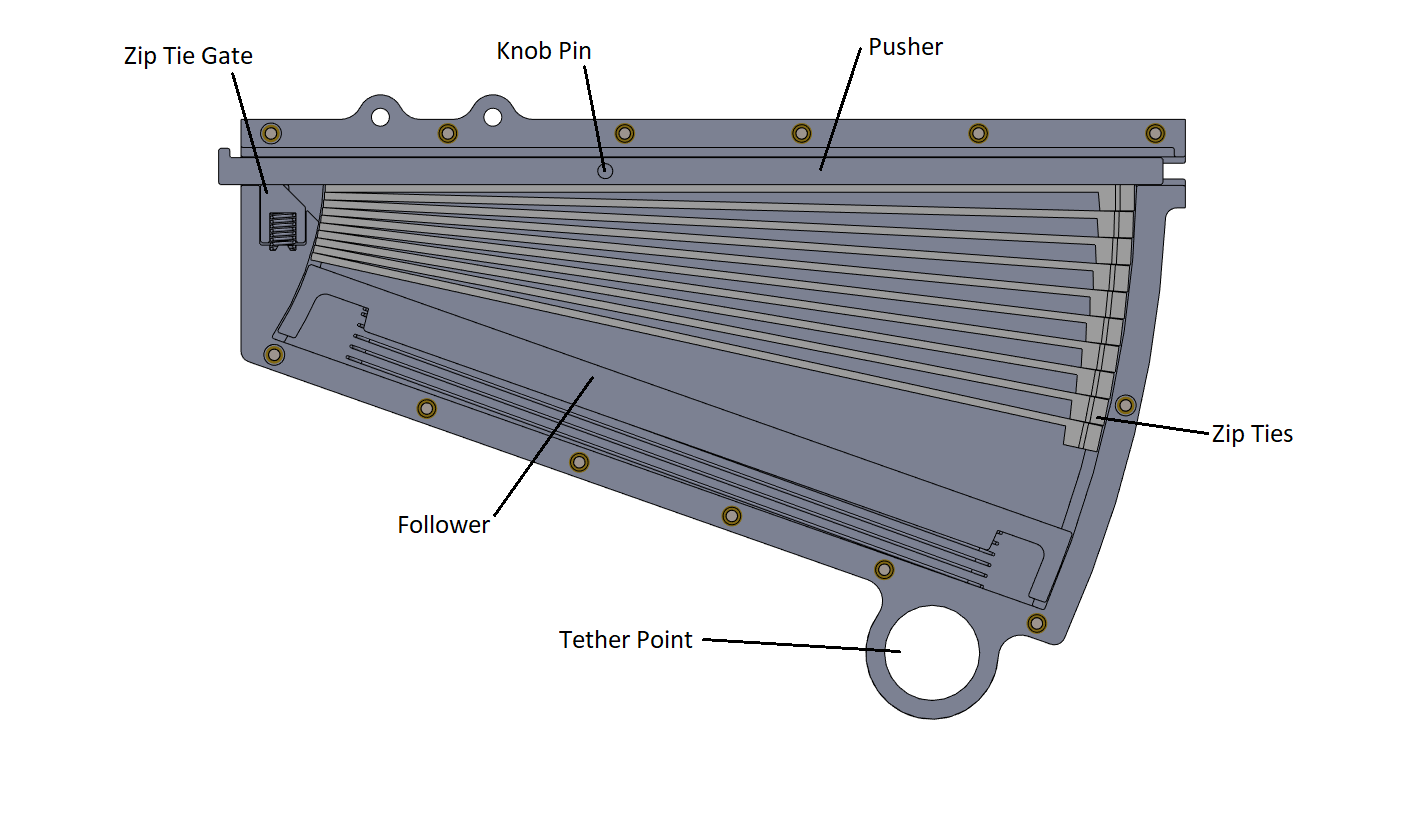
Magazine: V1
Magazine: V2
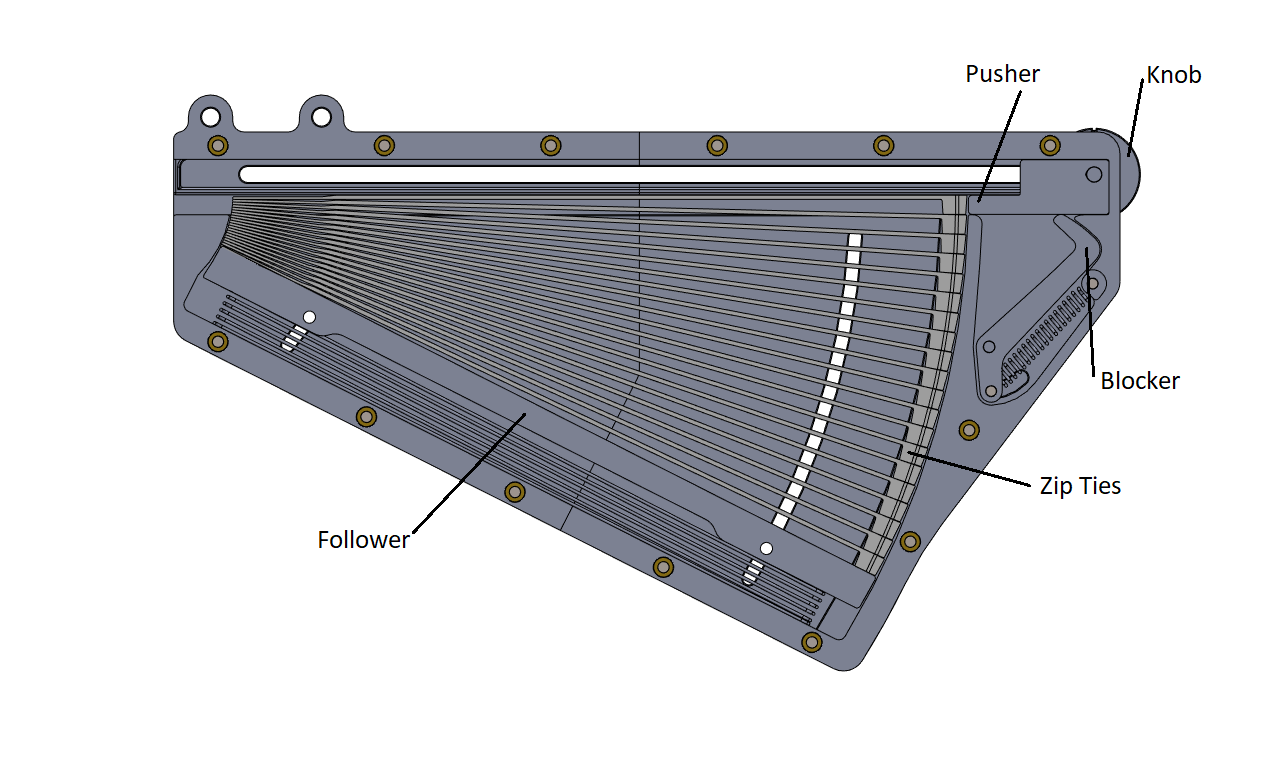
Magazine: V3
I used a top-down modeling approach to create the CAD model. This allowed me to make changes to the geometry of each mechanism quickly, while making sure all the parts that made up that mechanism could (usually) update automatically so that they still worked with each other. The main sketches I used to lay out the geometry of the jaw, tightener, and magazine are shown below.
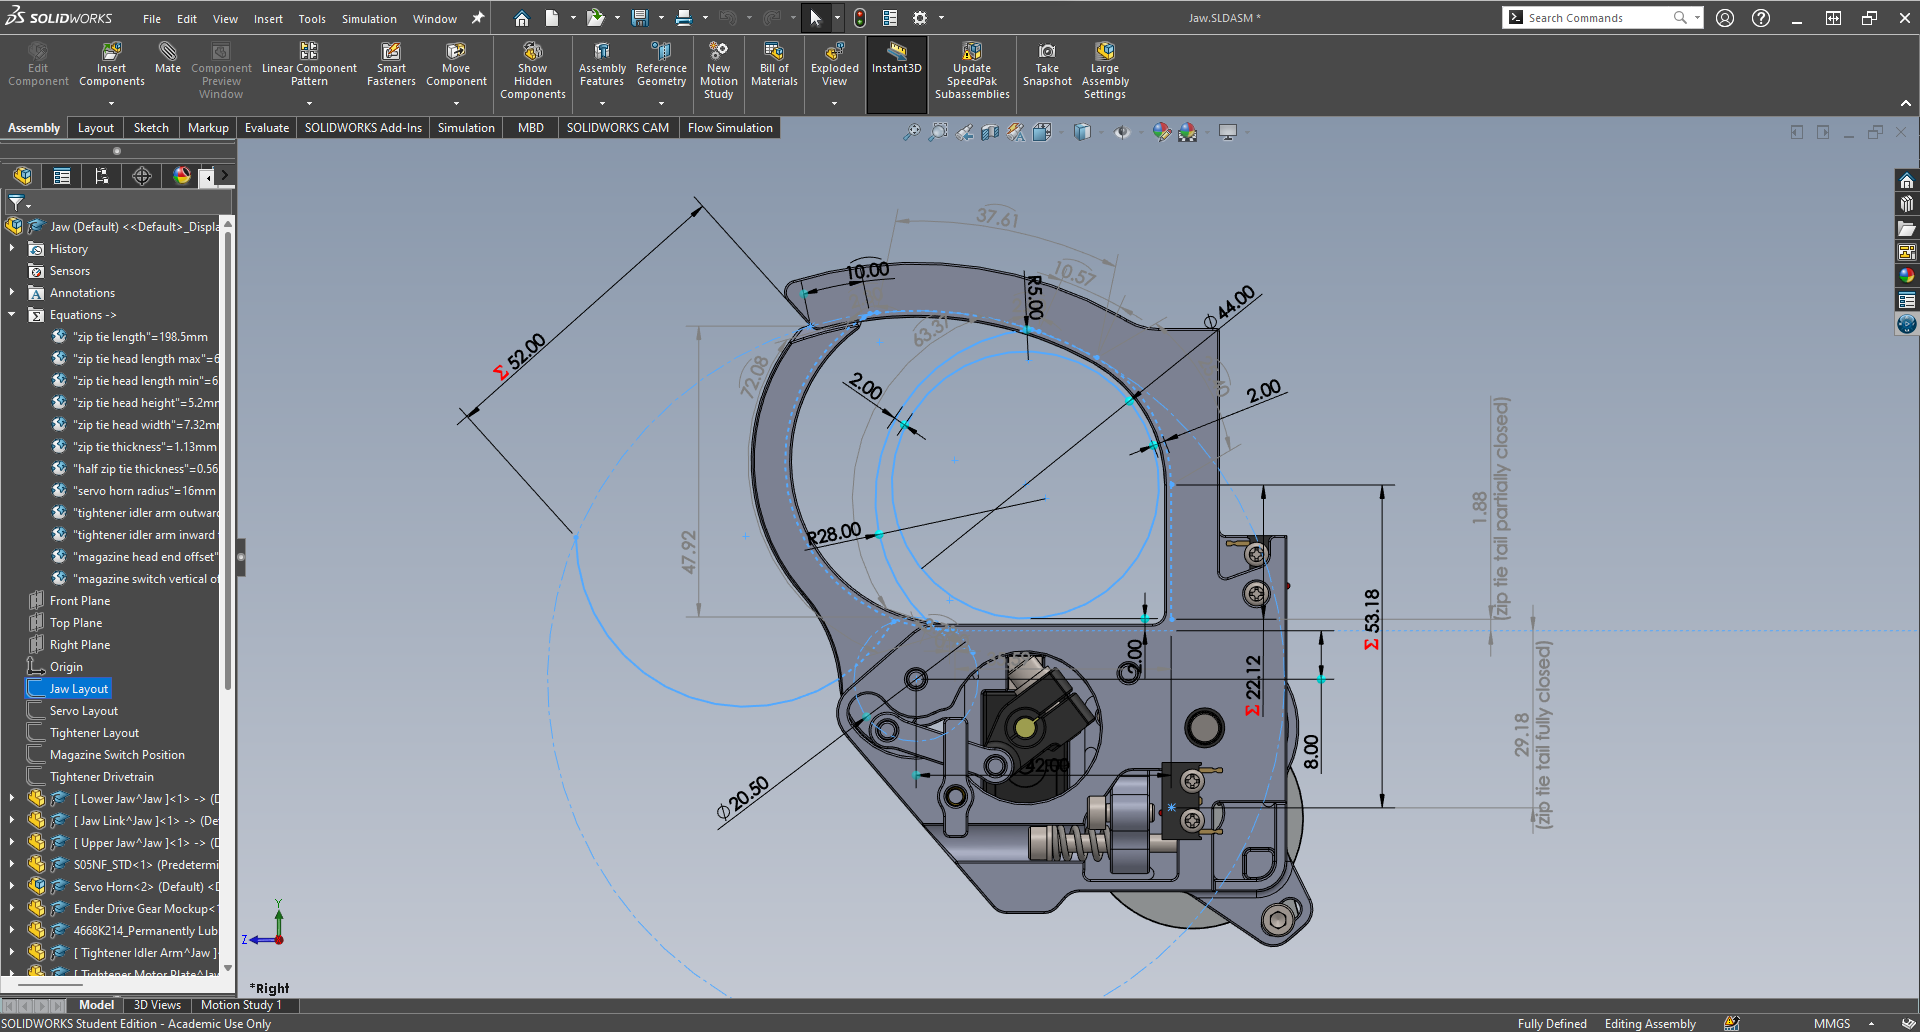
Jaw overall layout
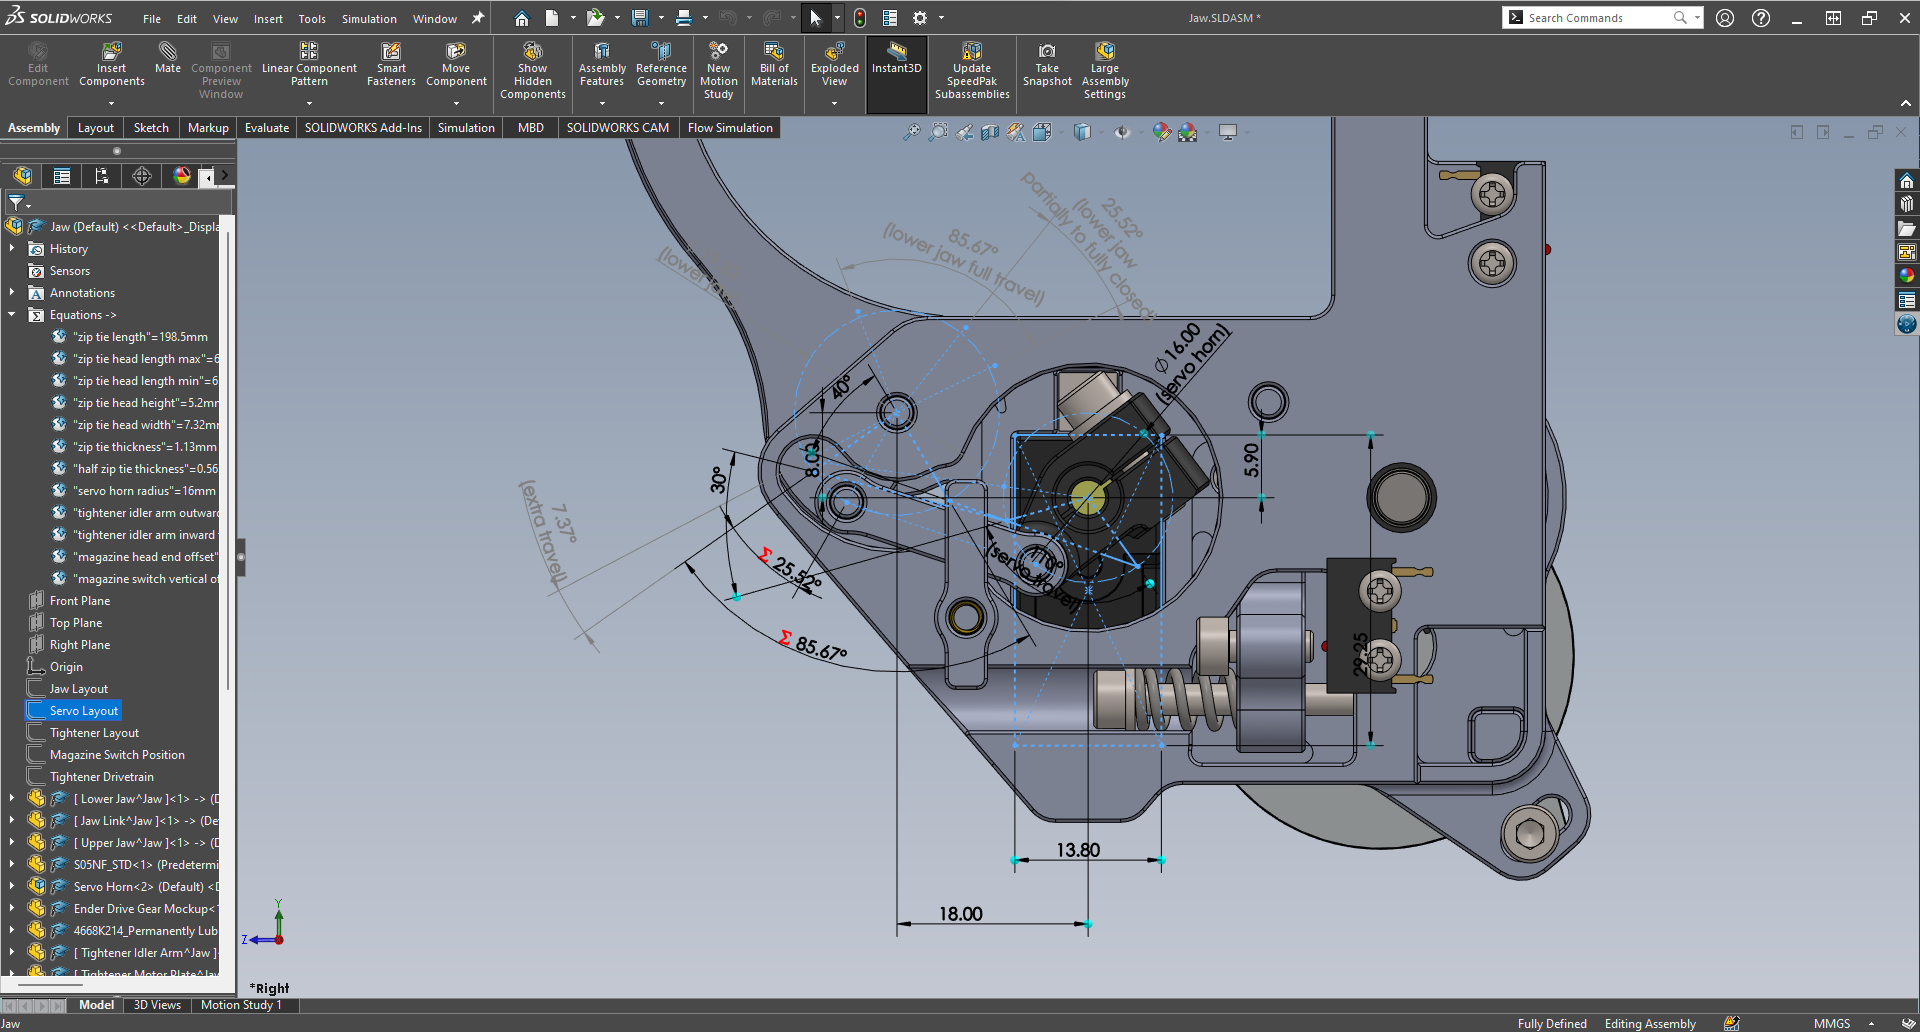
Jaw servo layout
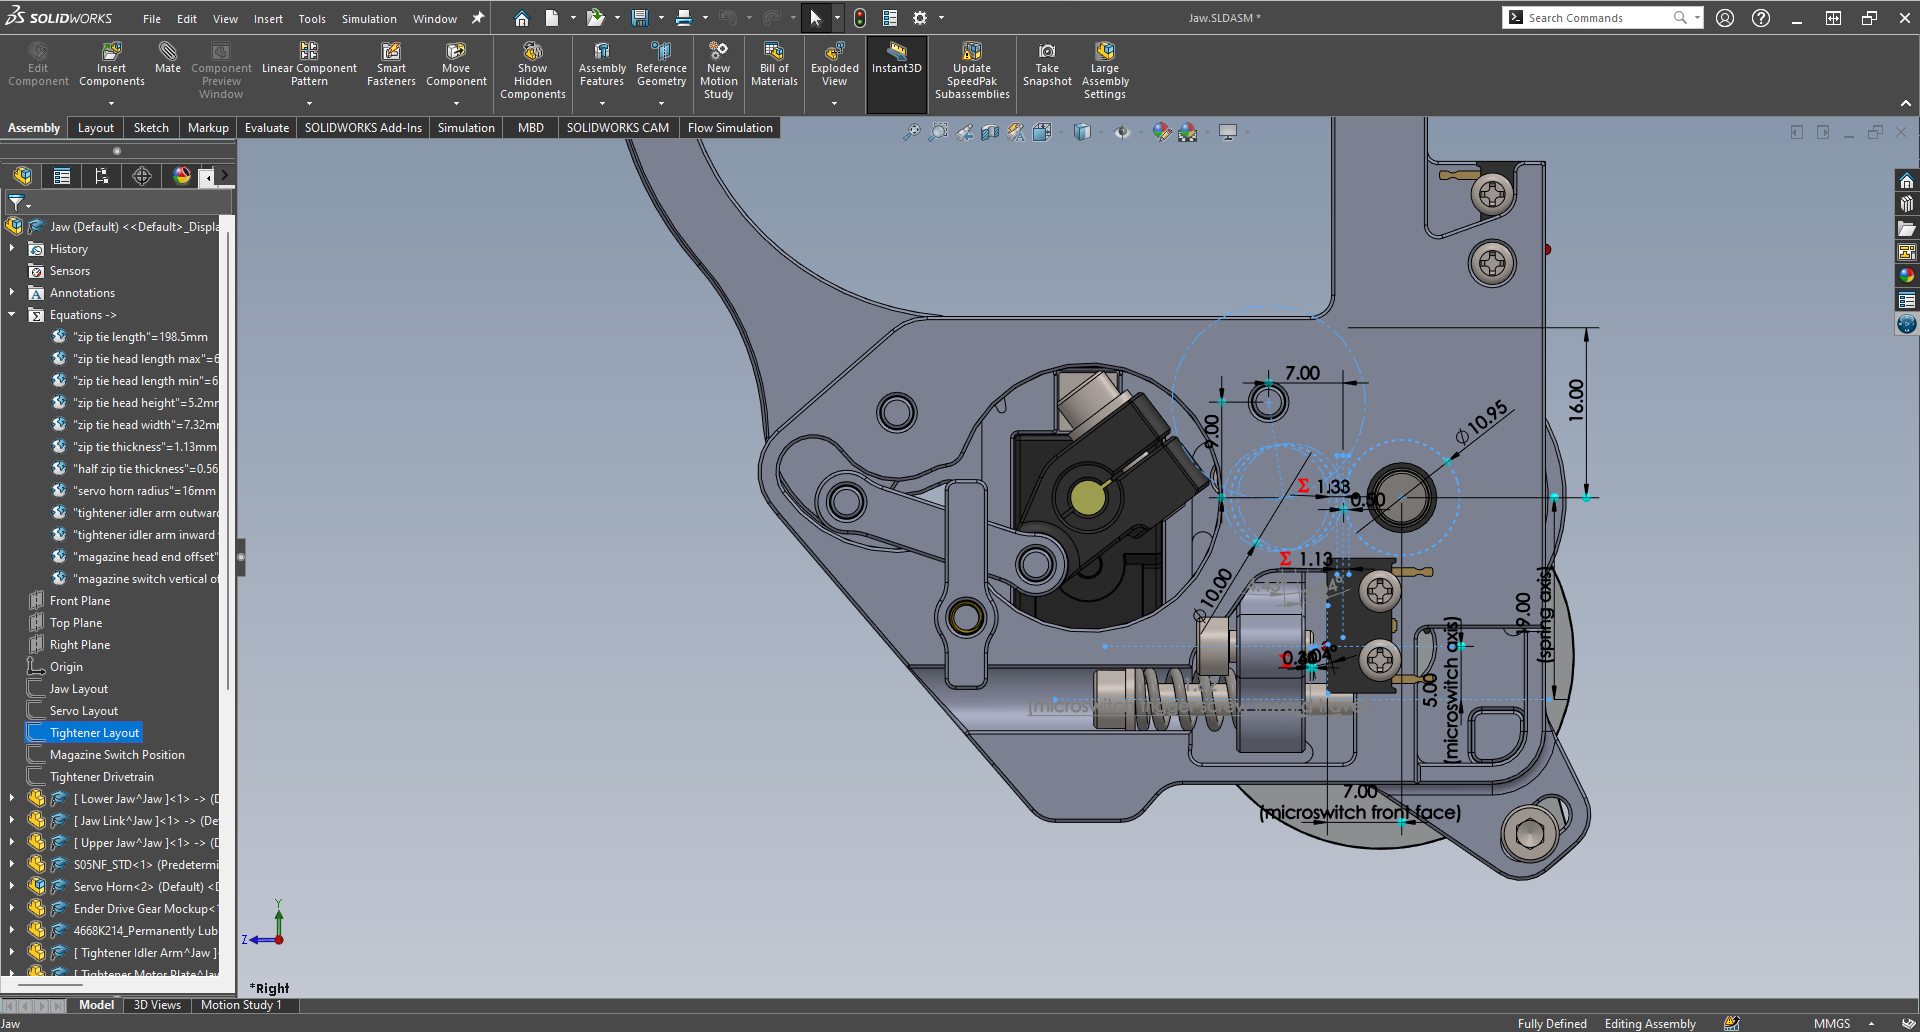
Tightener layout

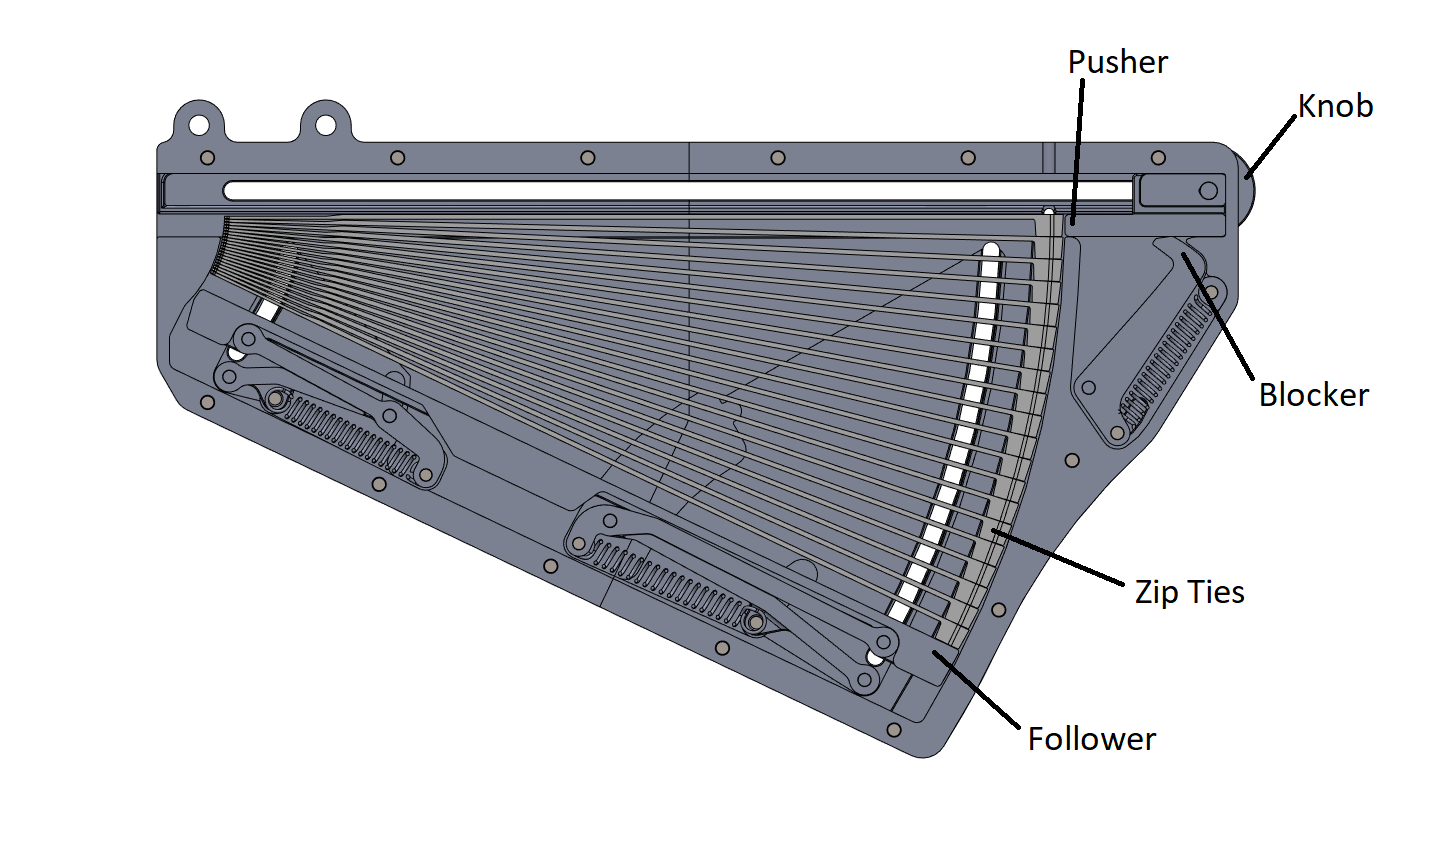
Magazine overall layout
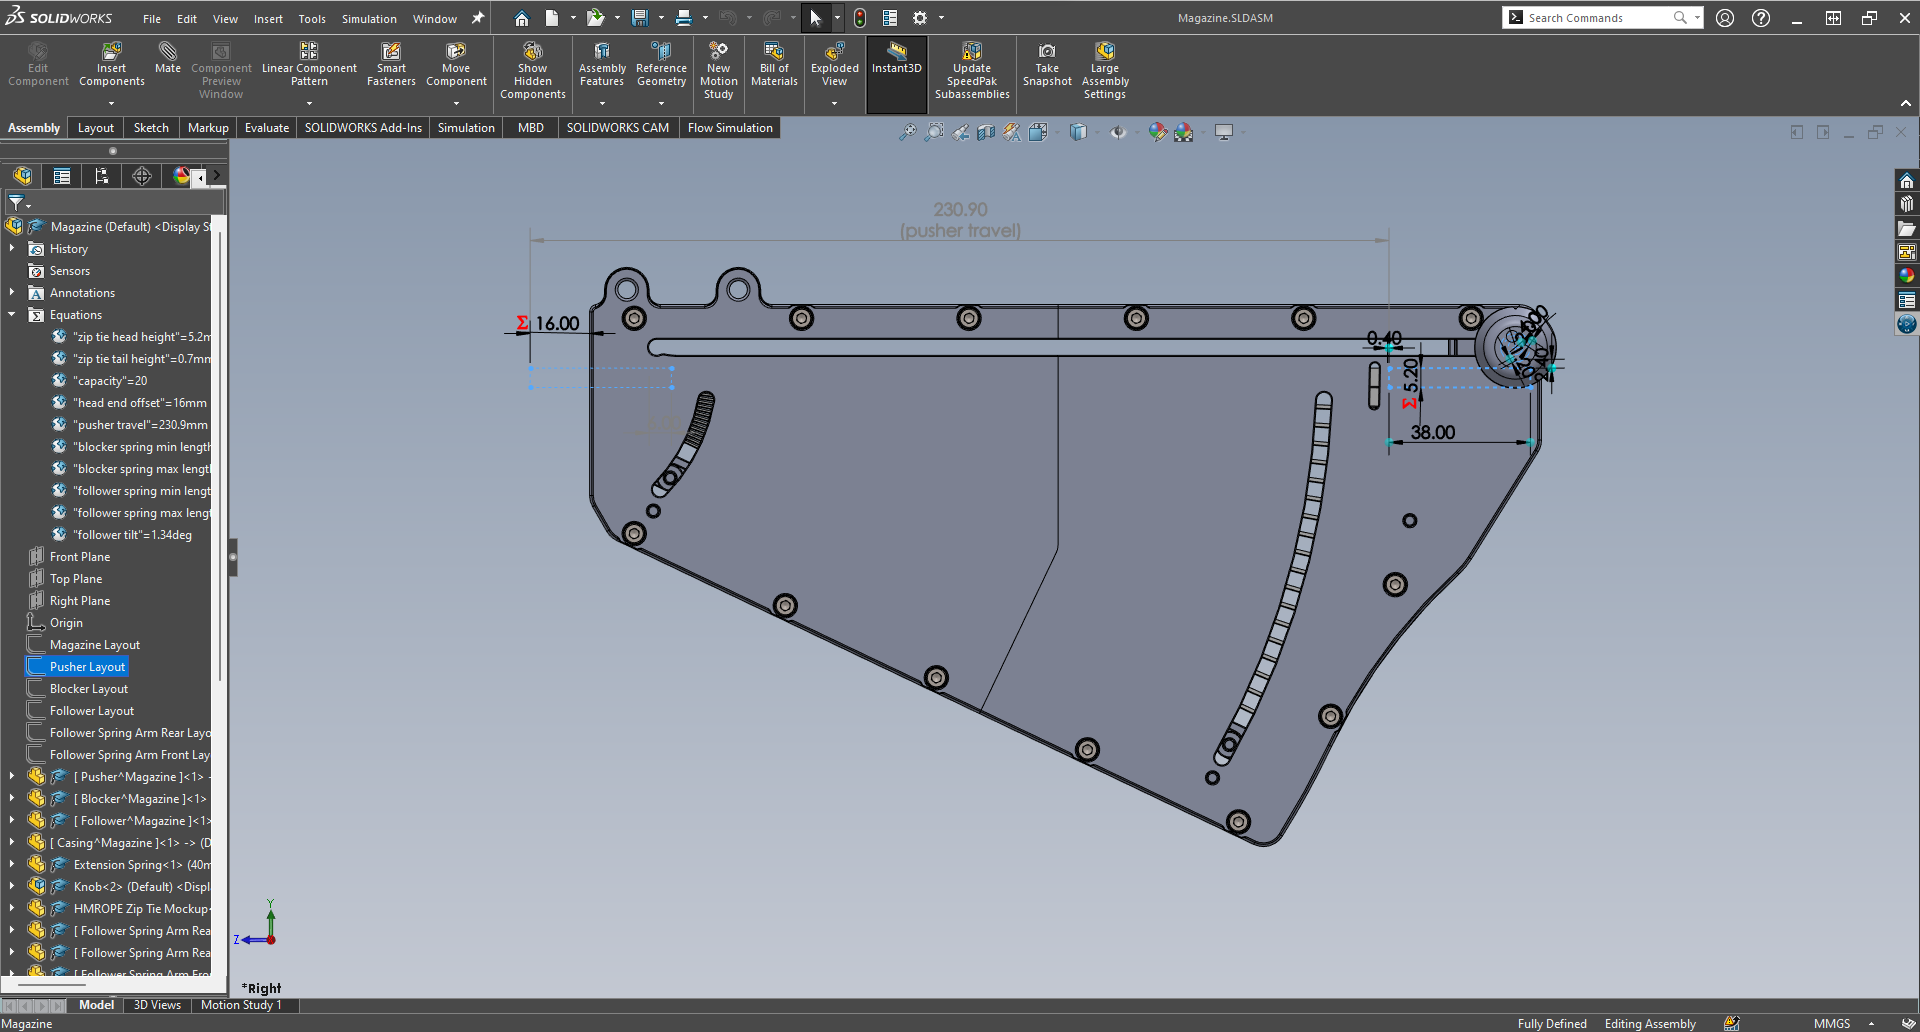
Magazine pusher layout
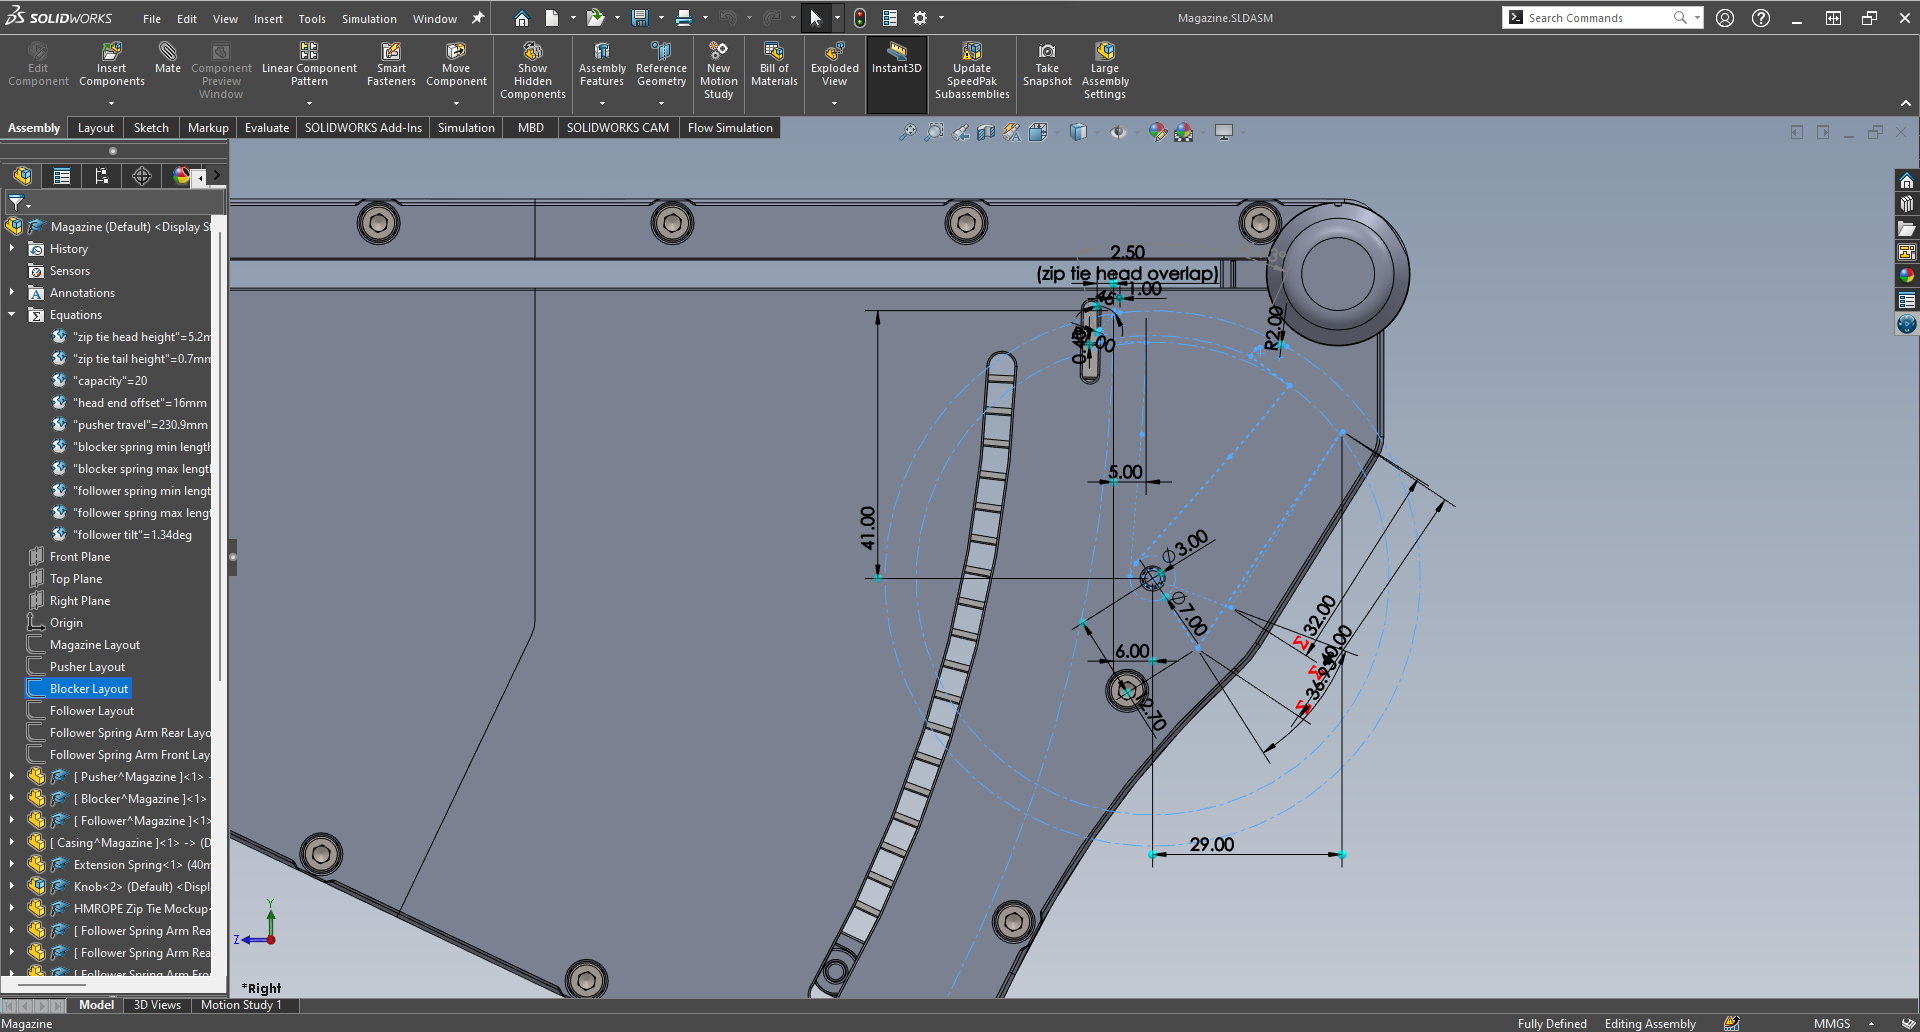
Magazine blocker layout
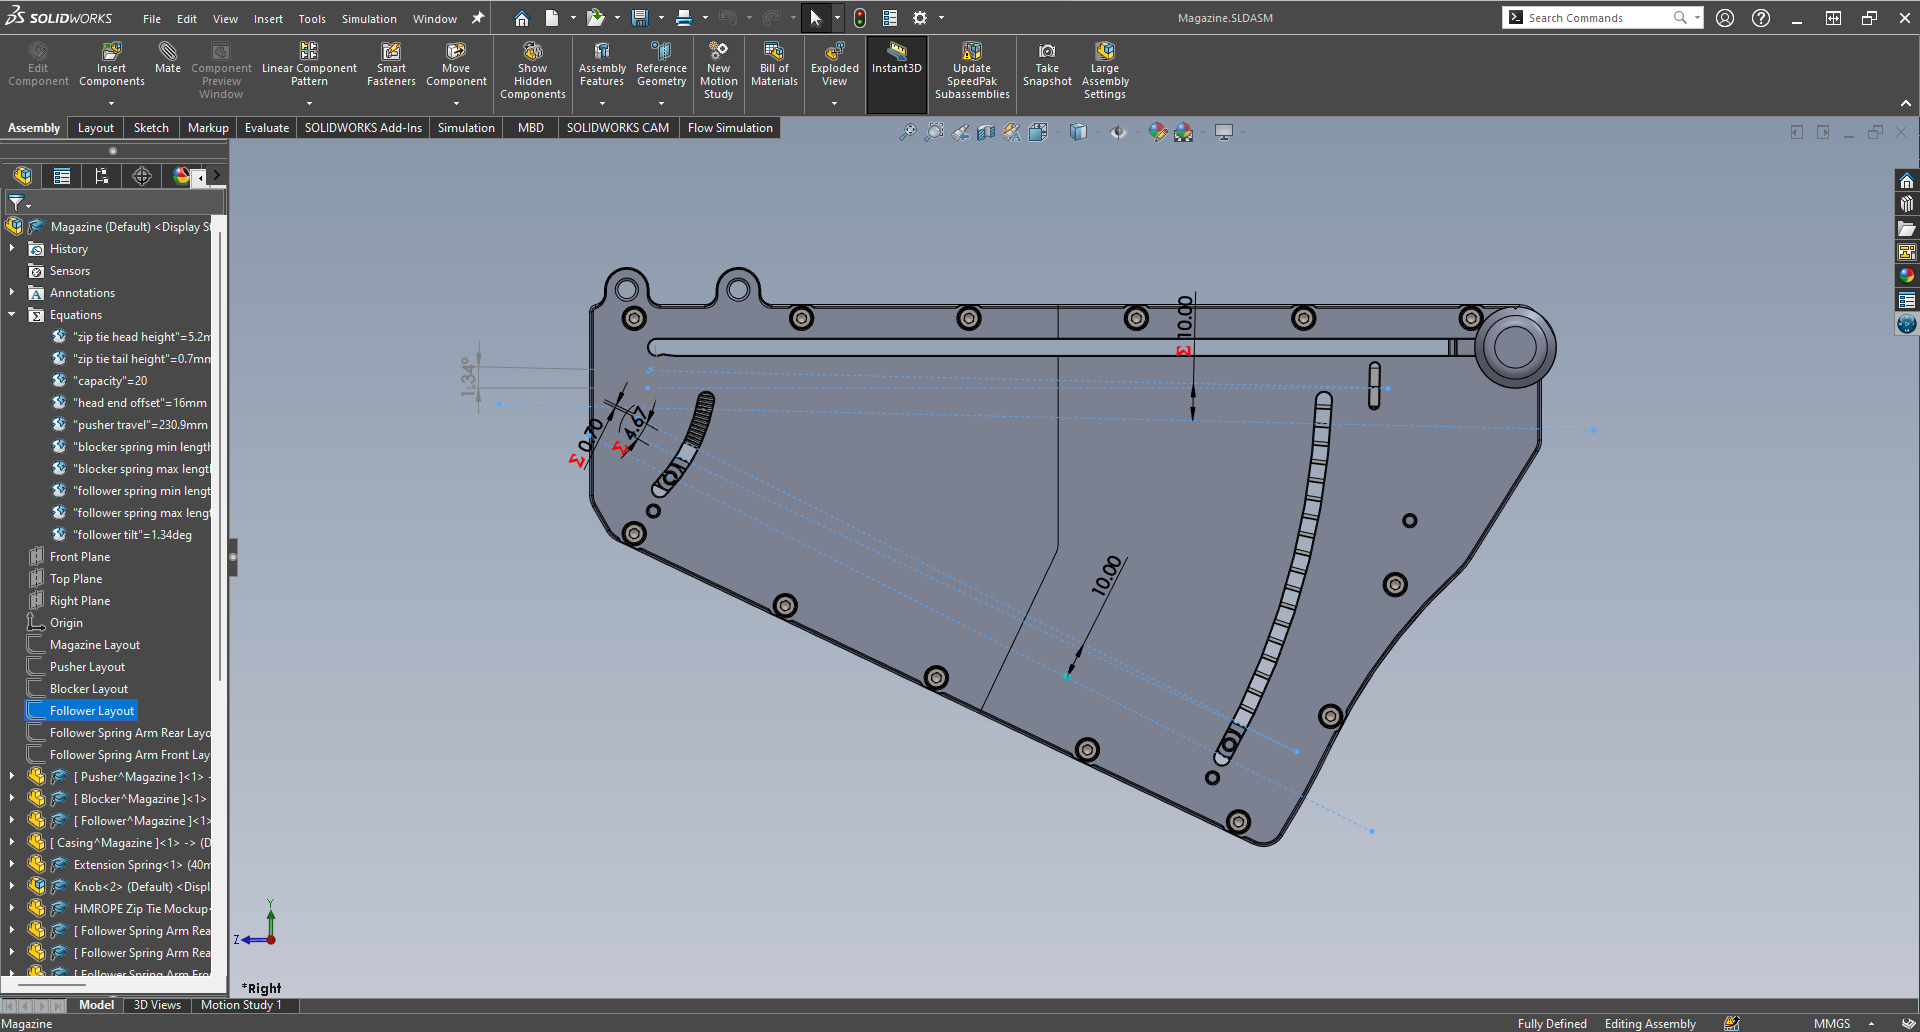
Magazine follower layout
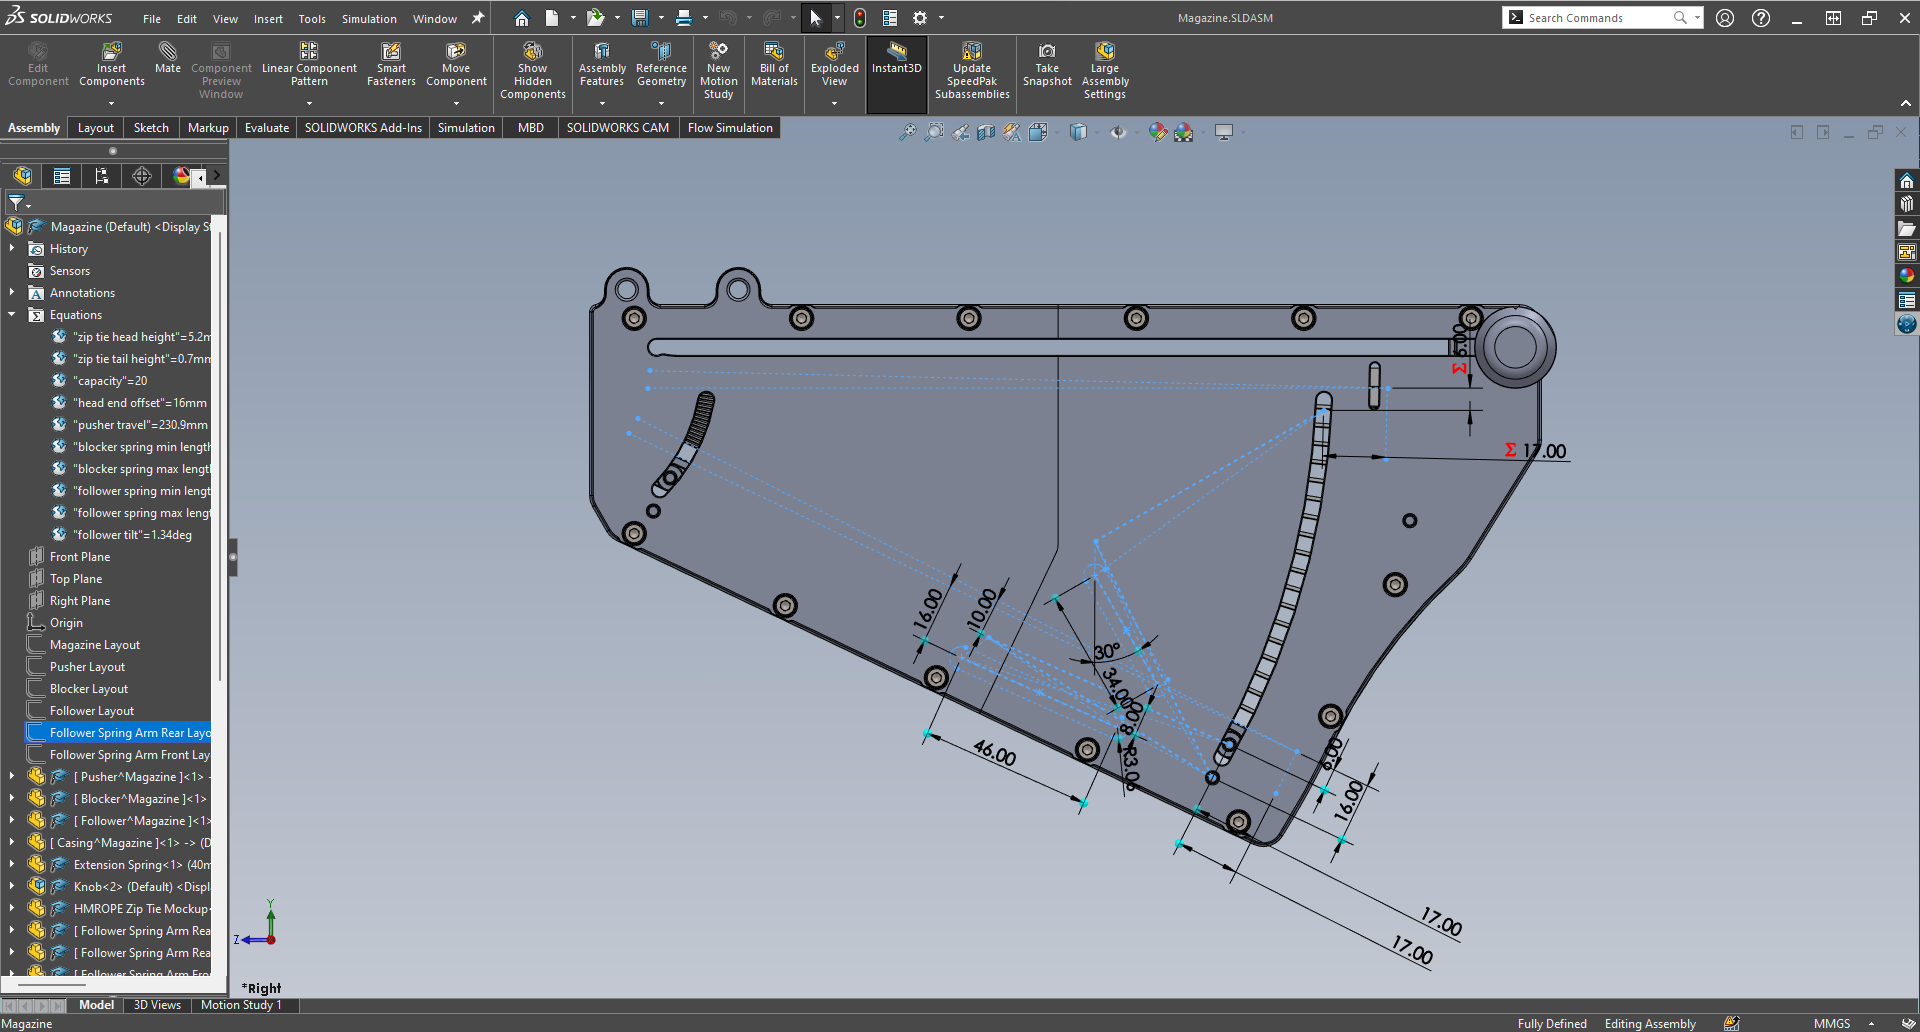
Magazine follower rear spring layout
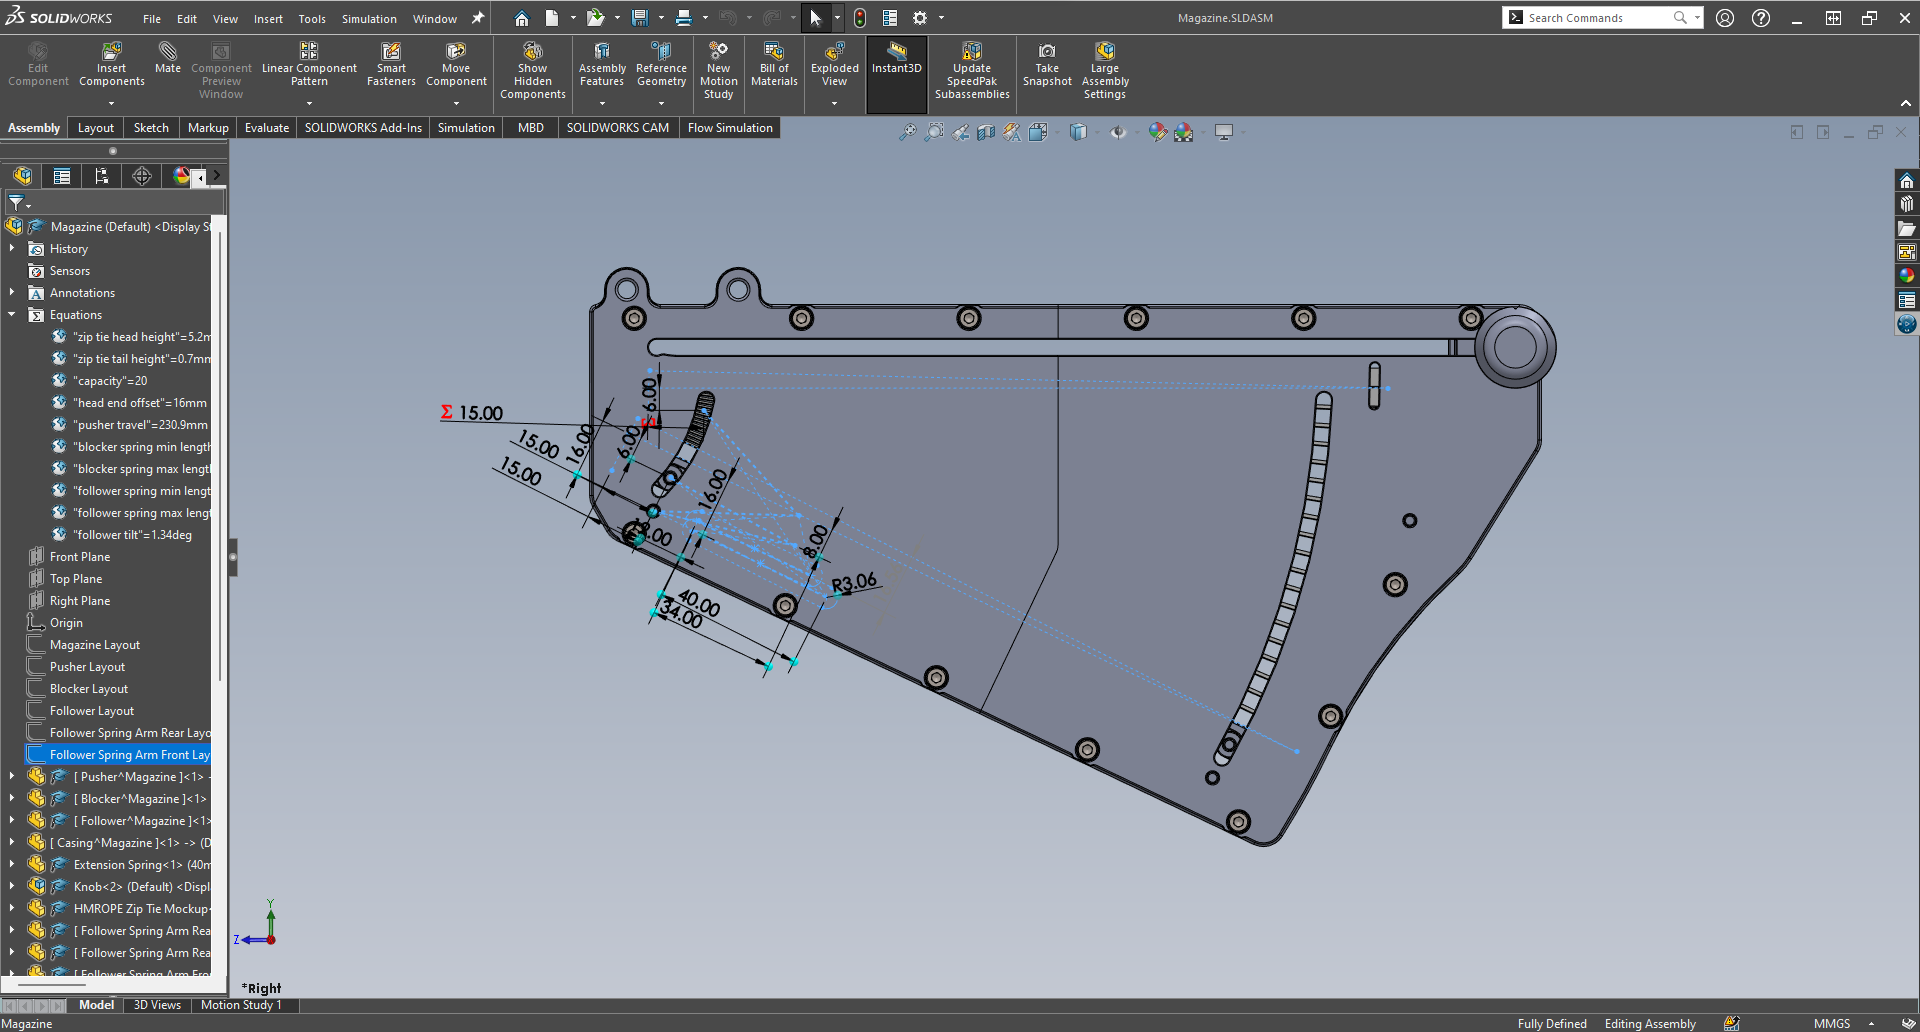
Magazine follower front spring layout
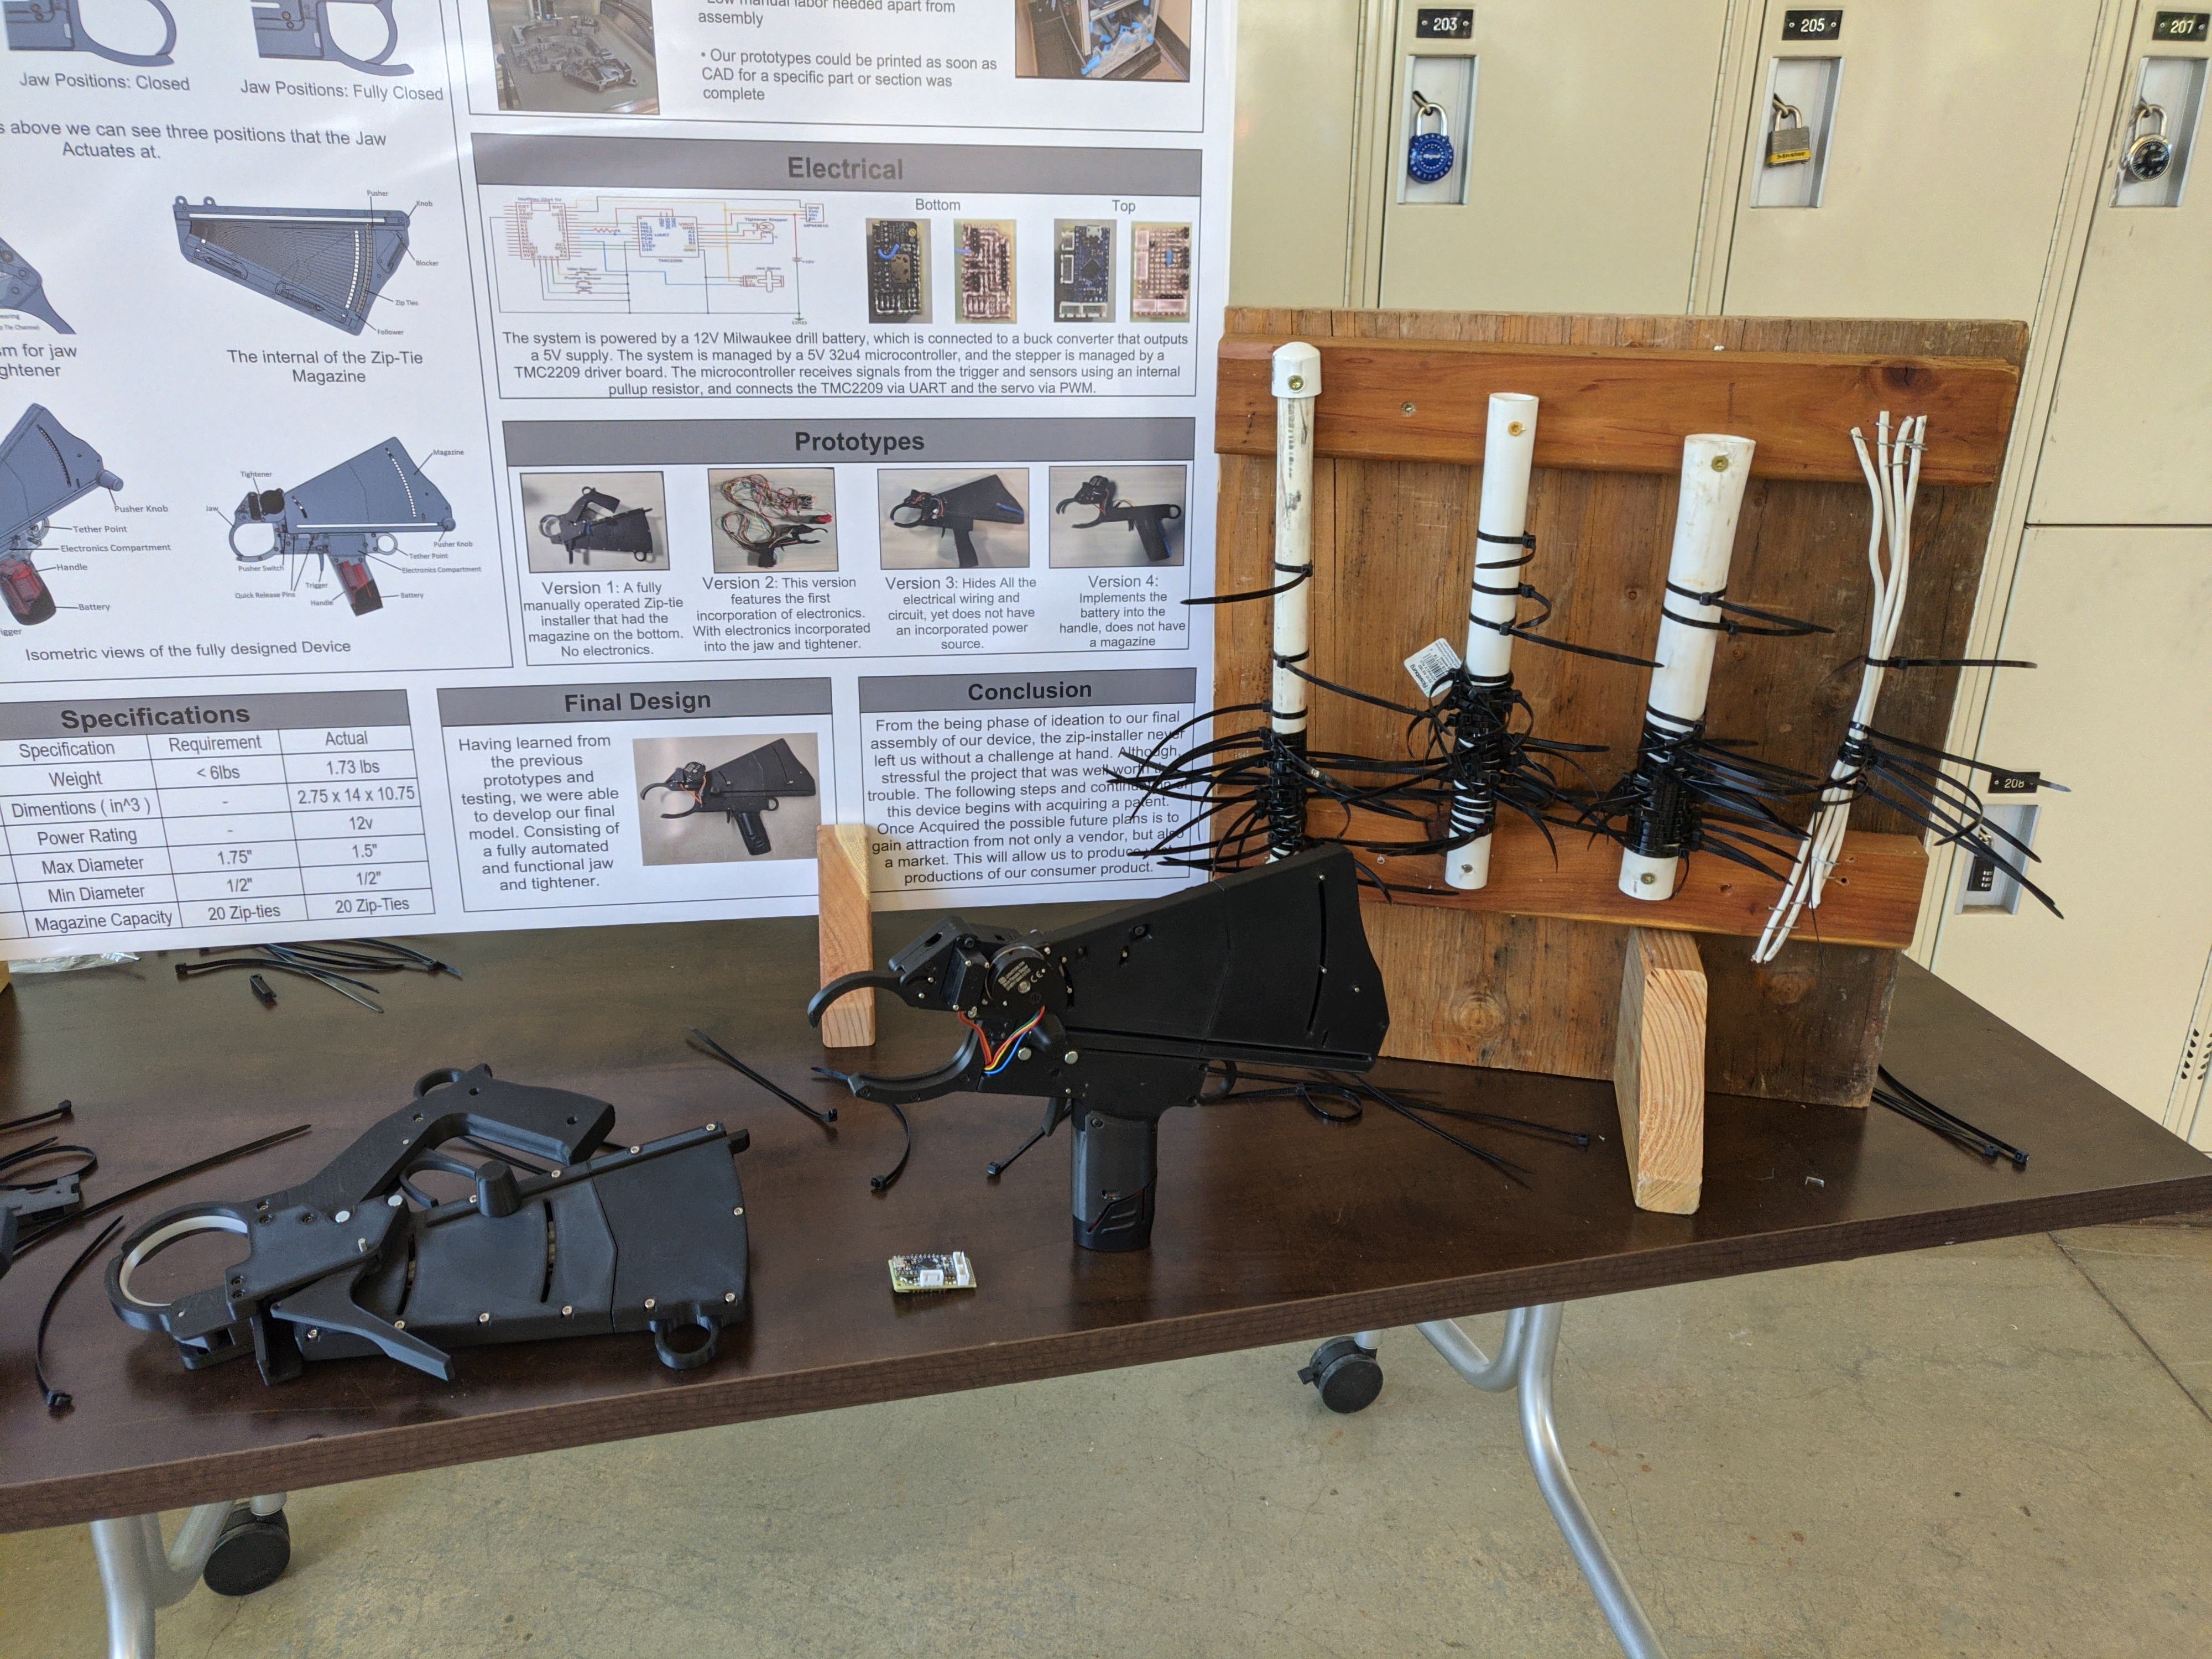
Prototyping and Testing
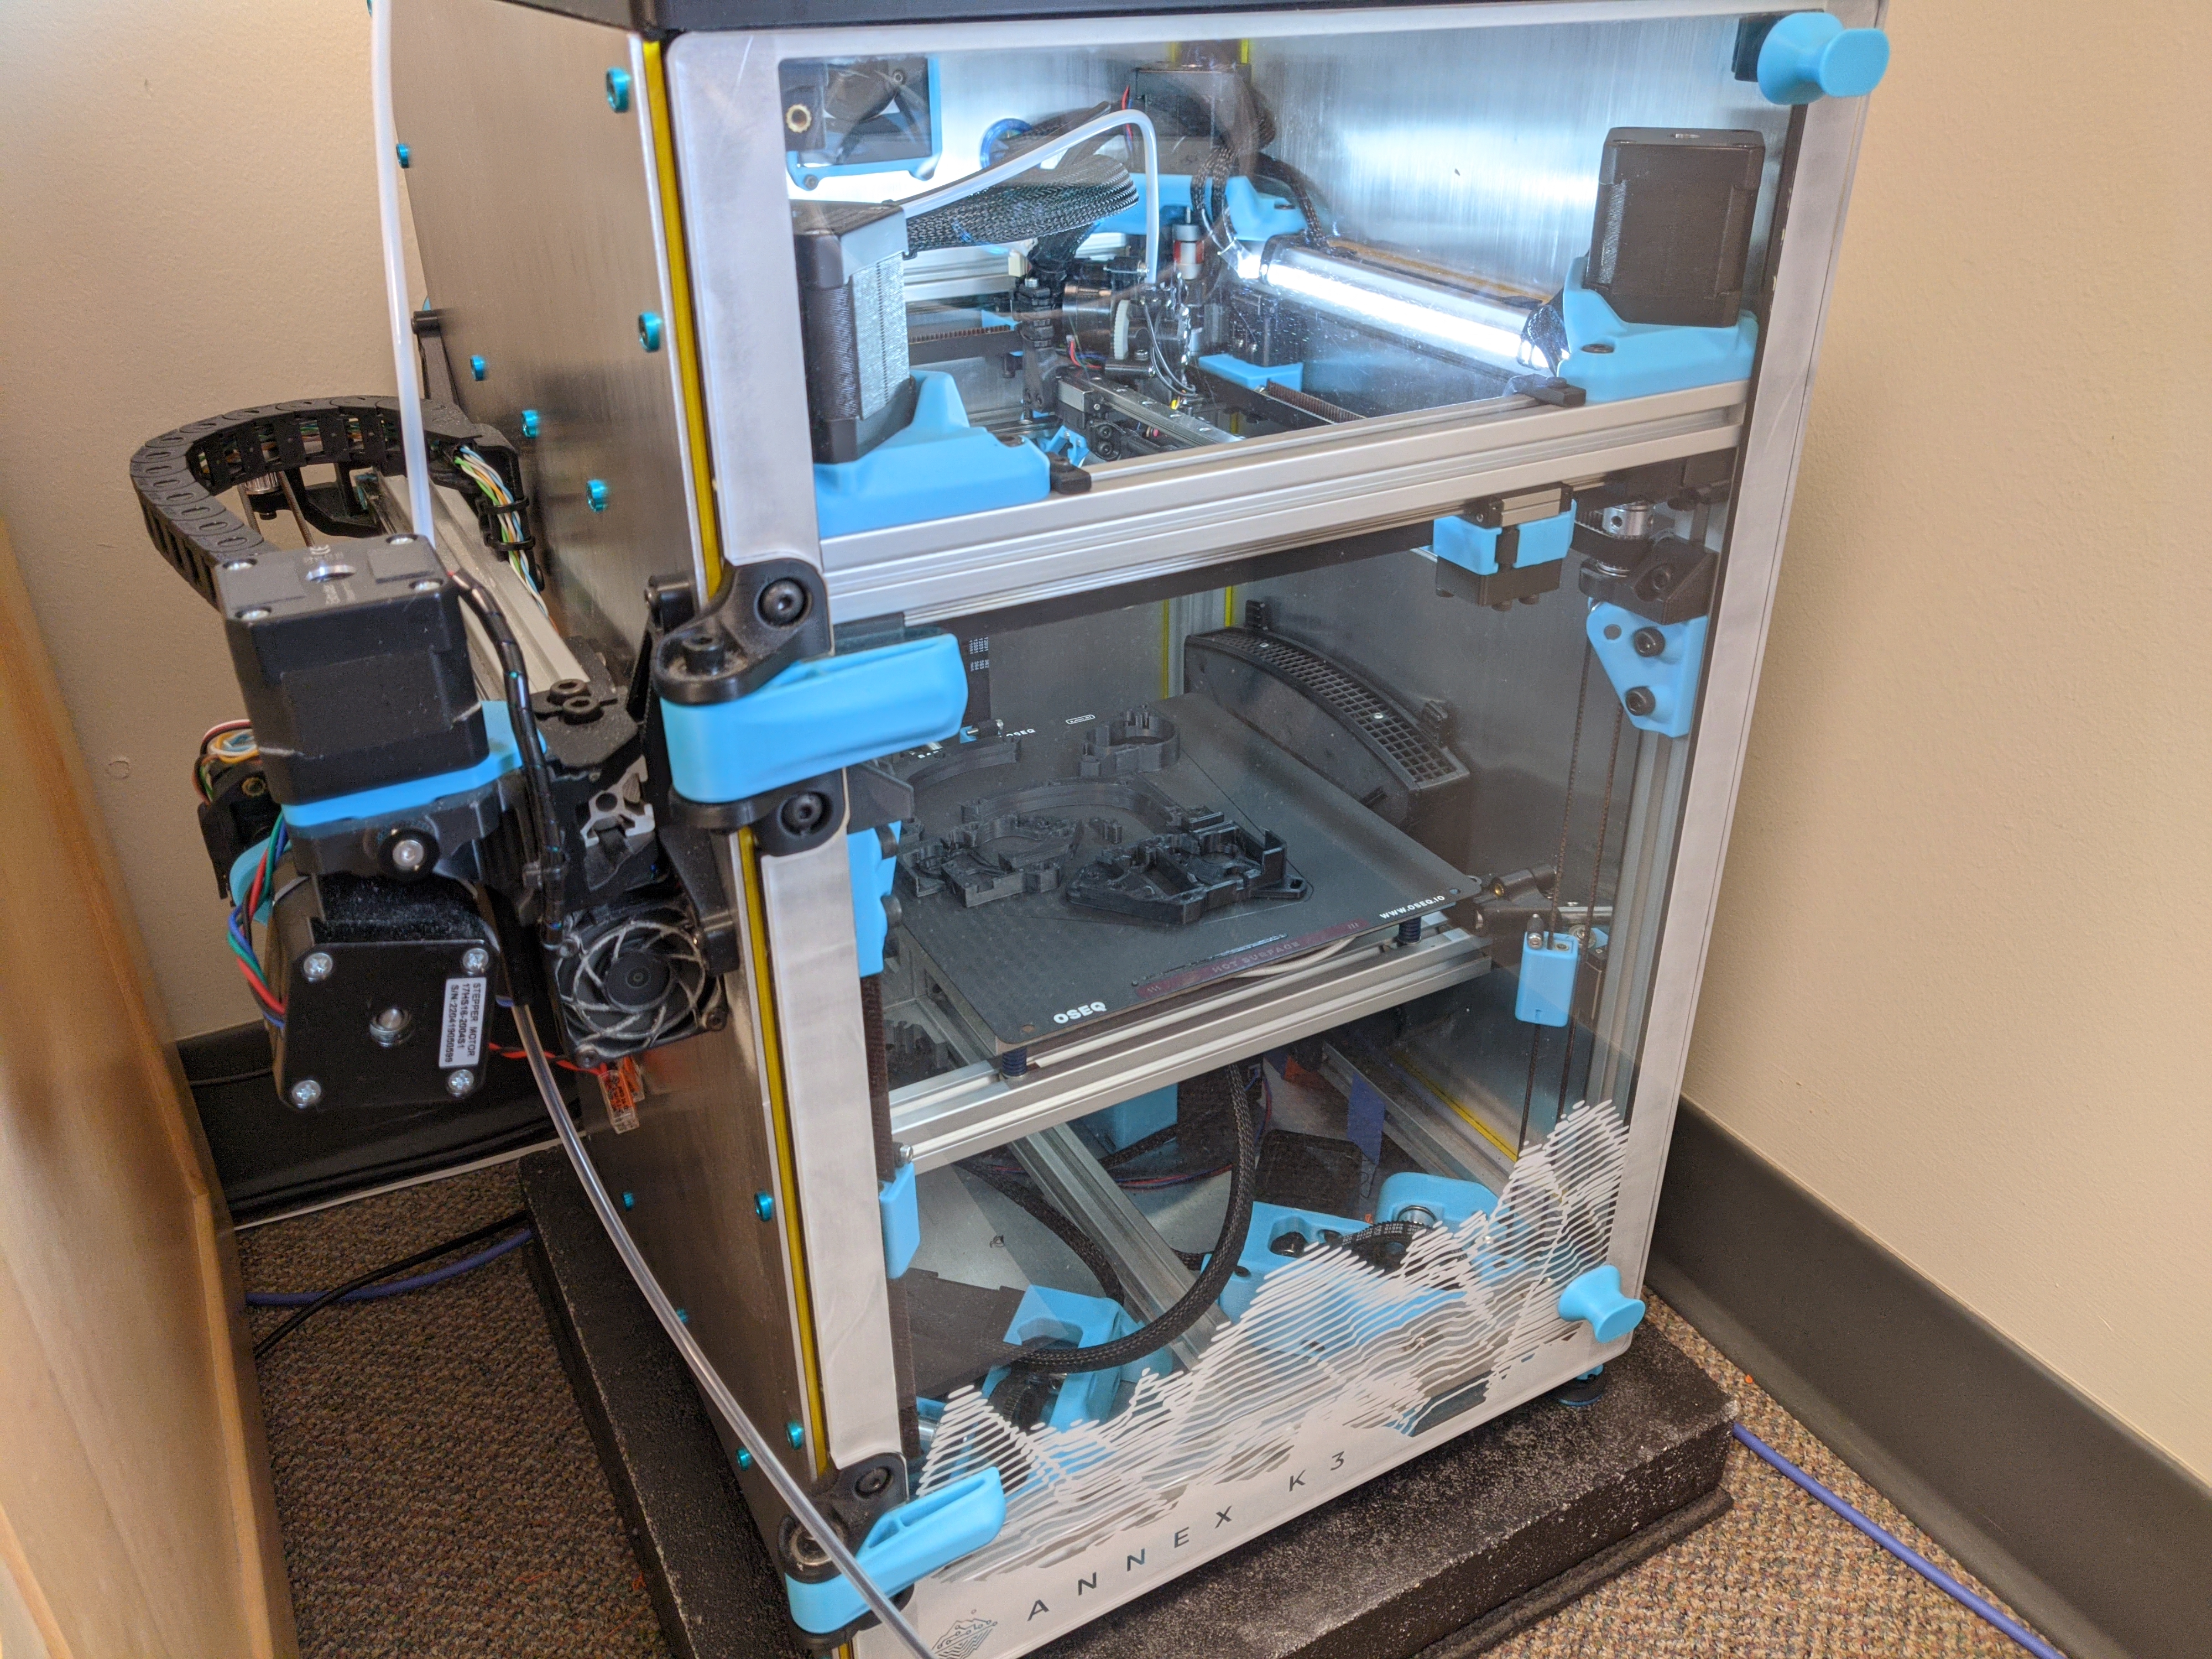
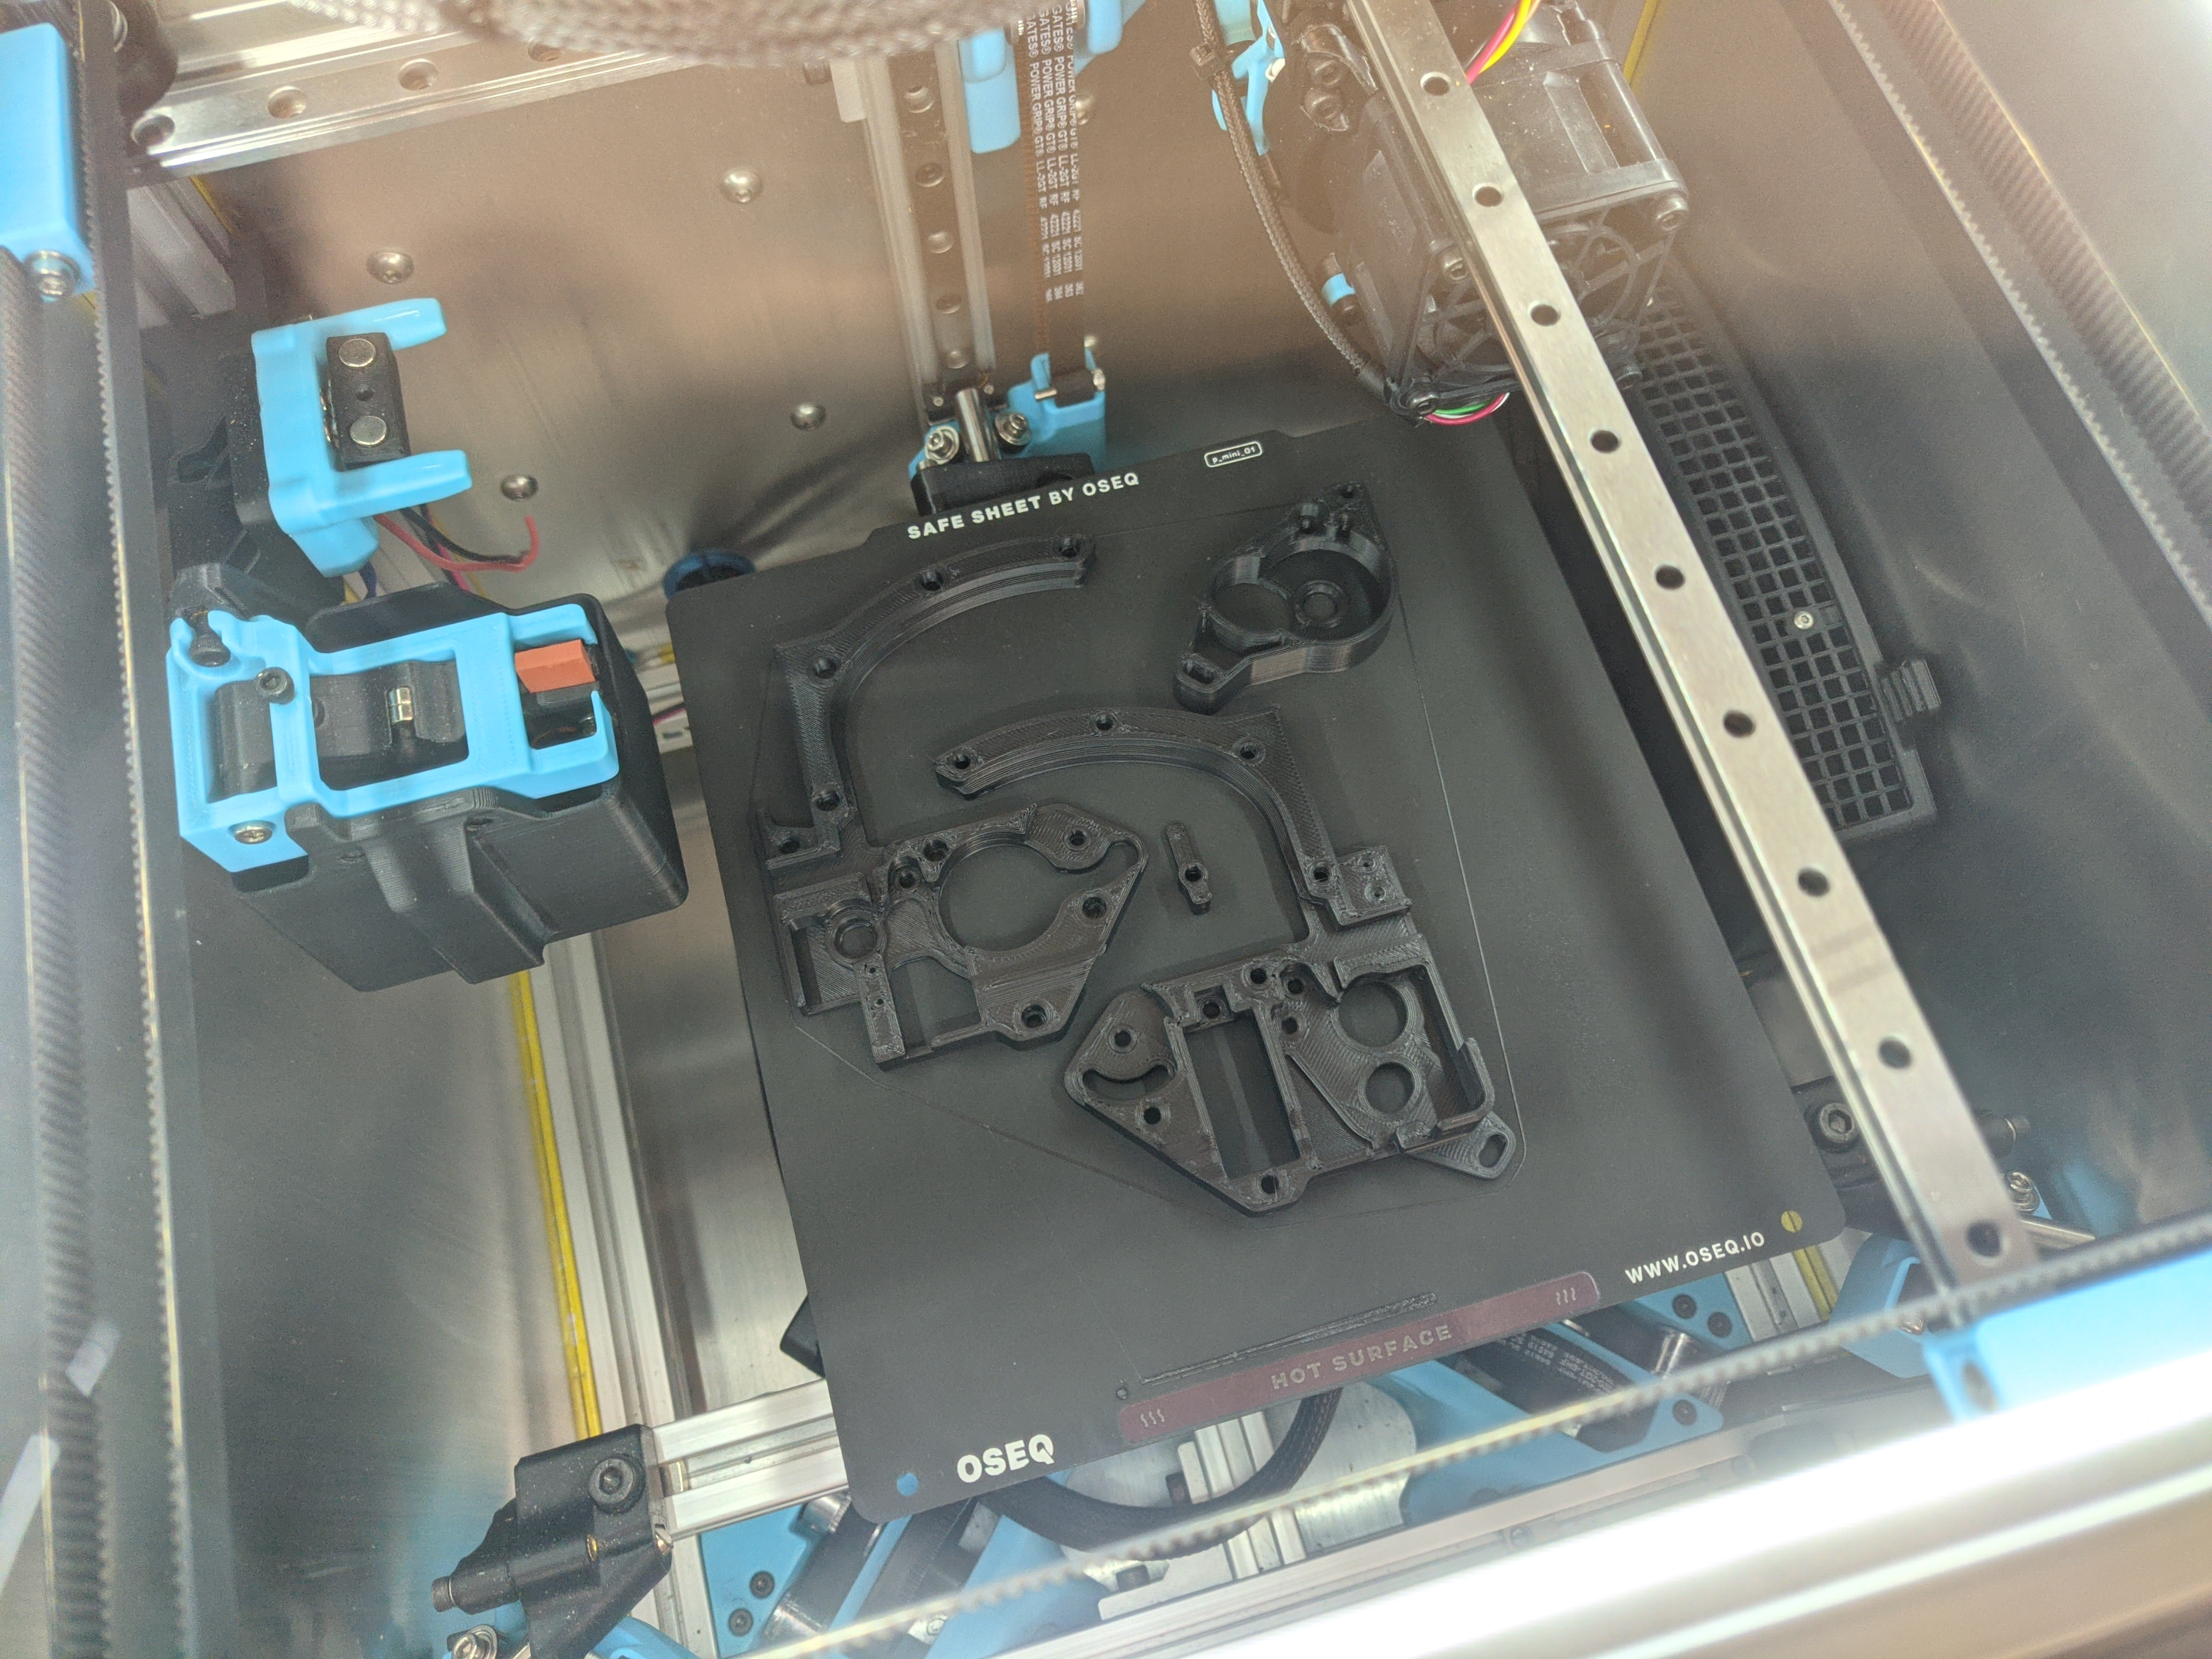
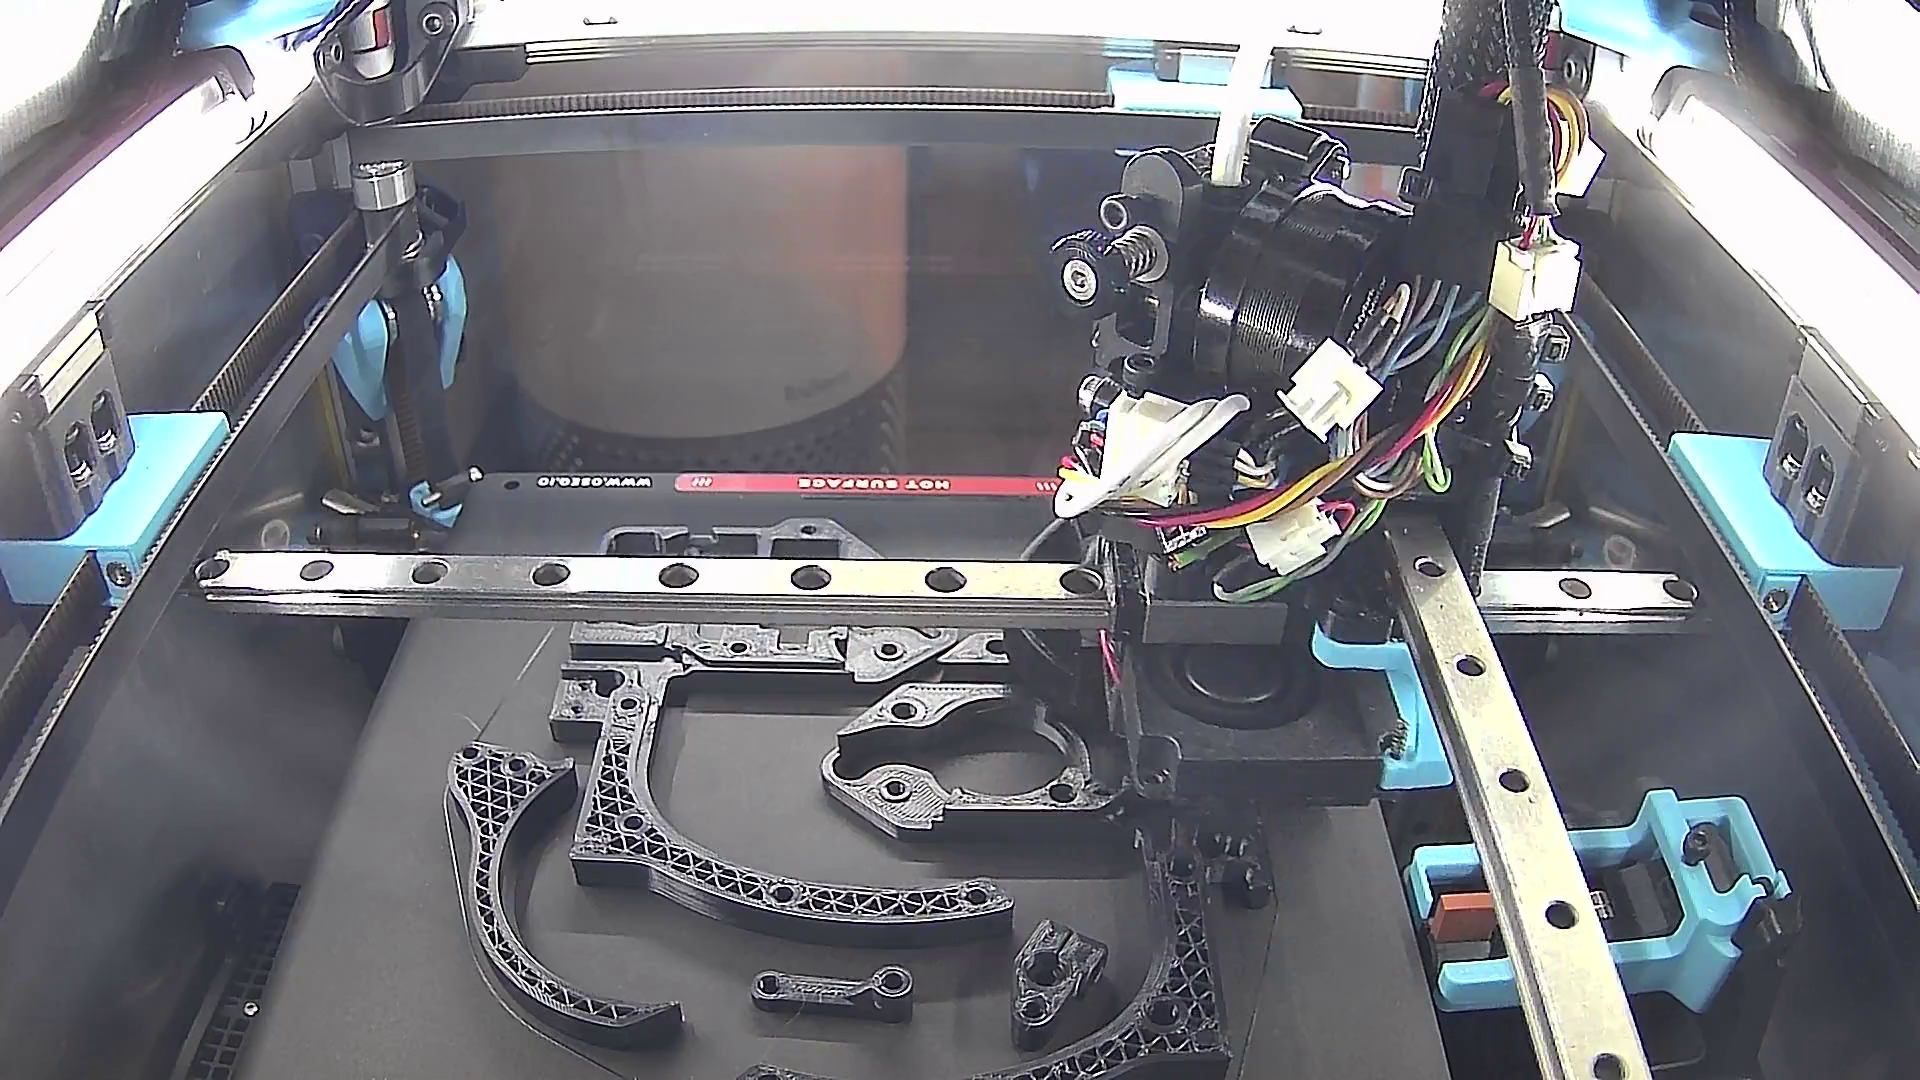
We chose to use 3D printing for all of the custom parts of the zip tie installer since it allowed us to create complex geometries and iterate quickly. We went through several cycles of doing CAD design, printing a new prototype, testing the prototype, and making improvements to the model based on our findings. All custom parts were printed out of ABS or ASA plastic on my K3 printer:
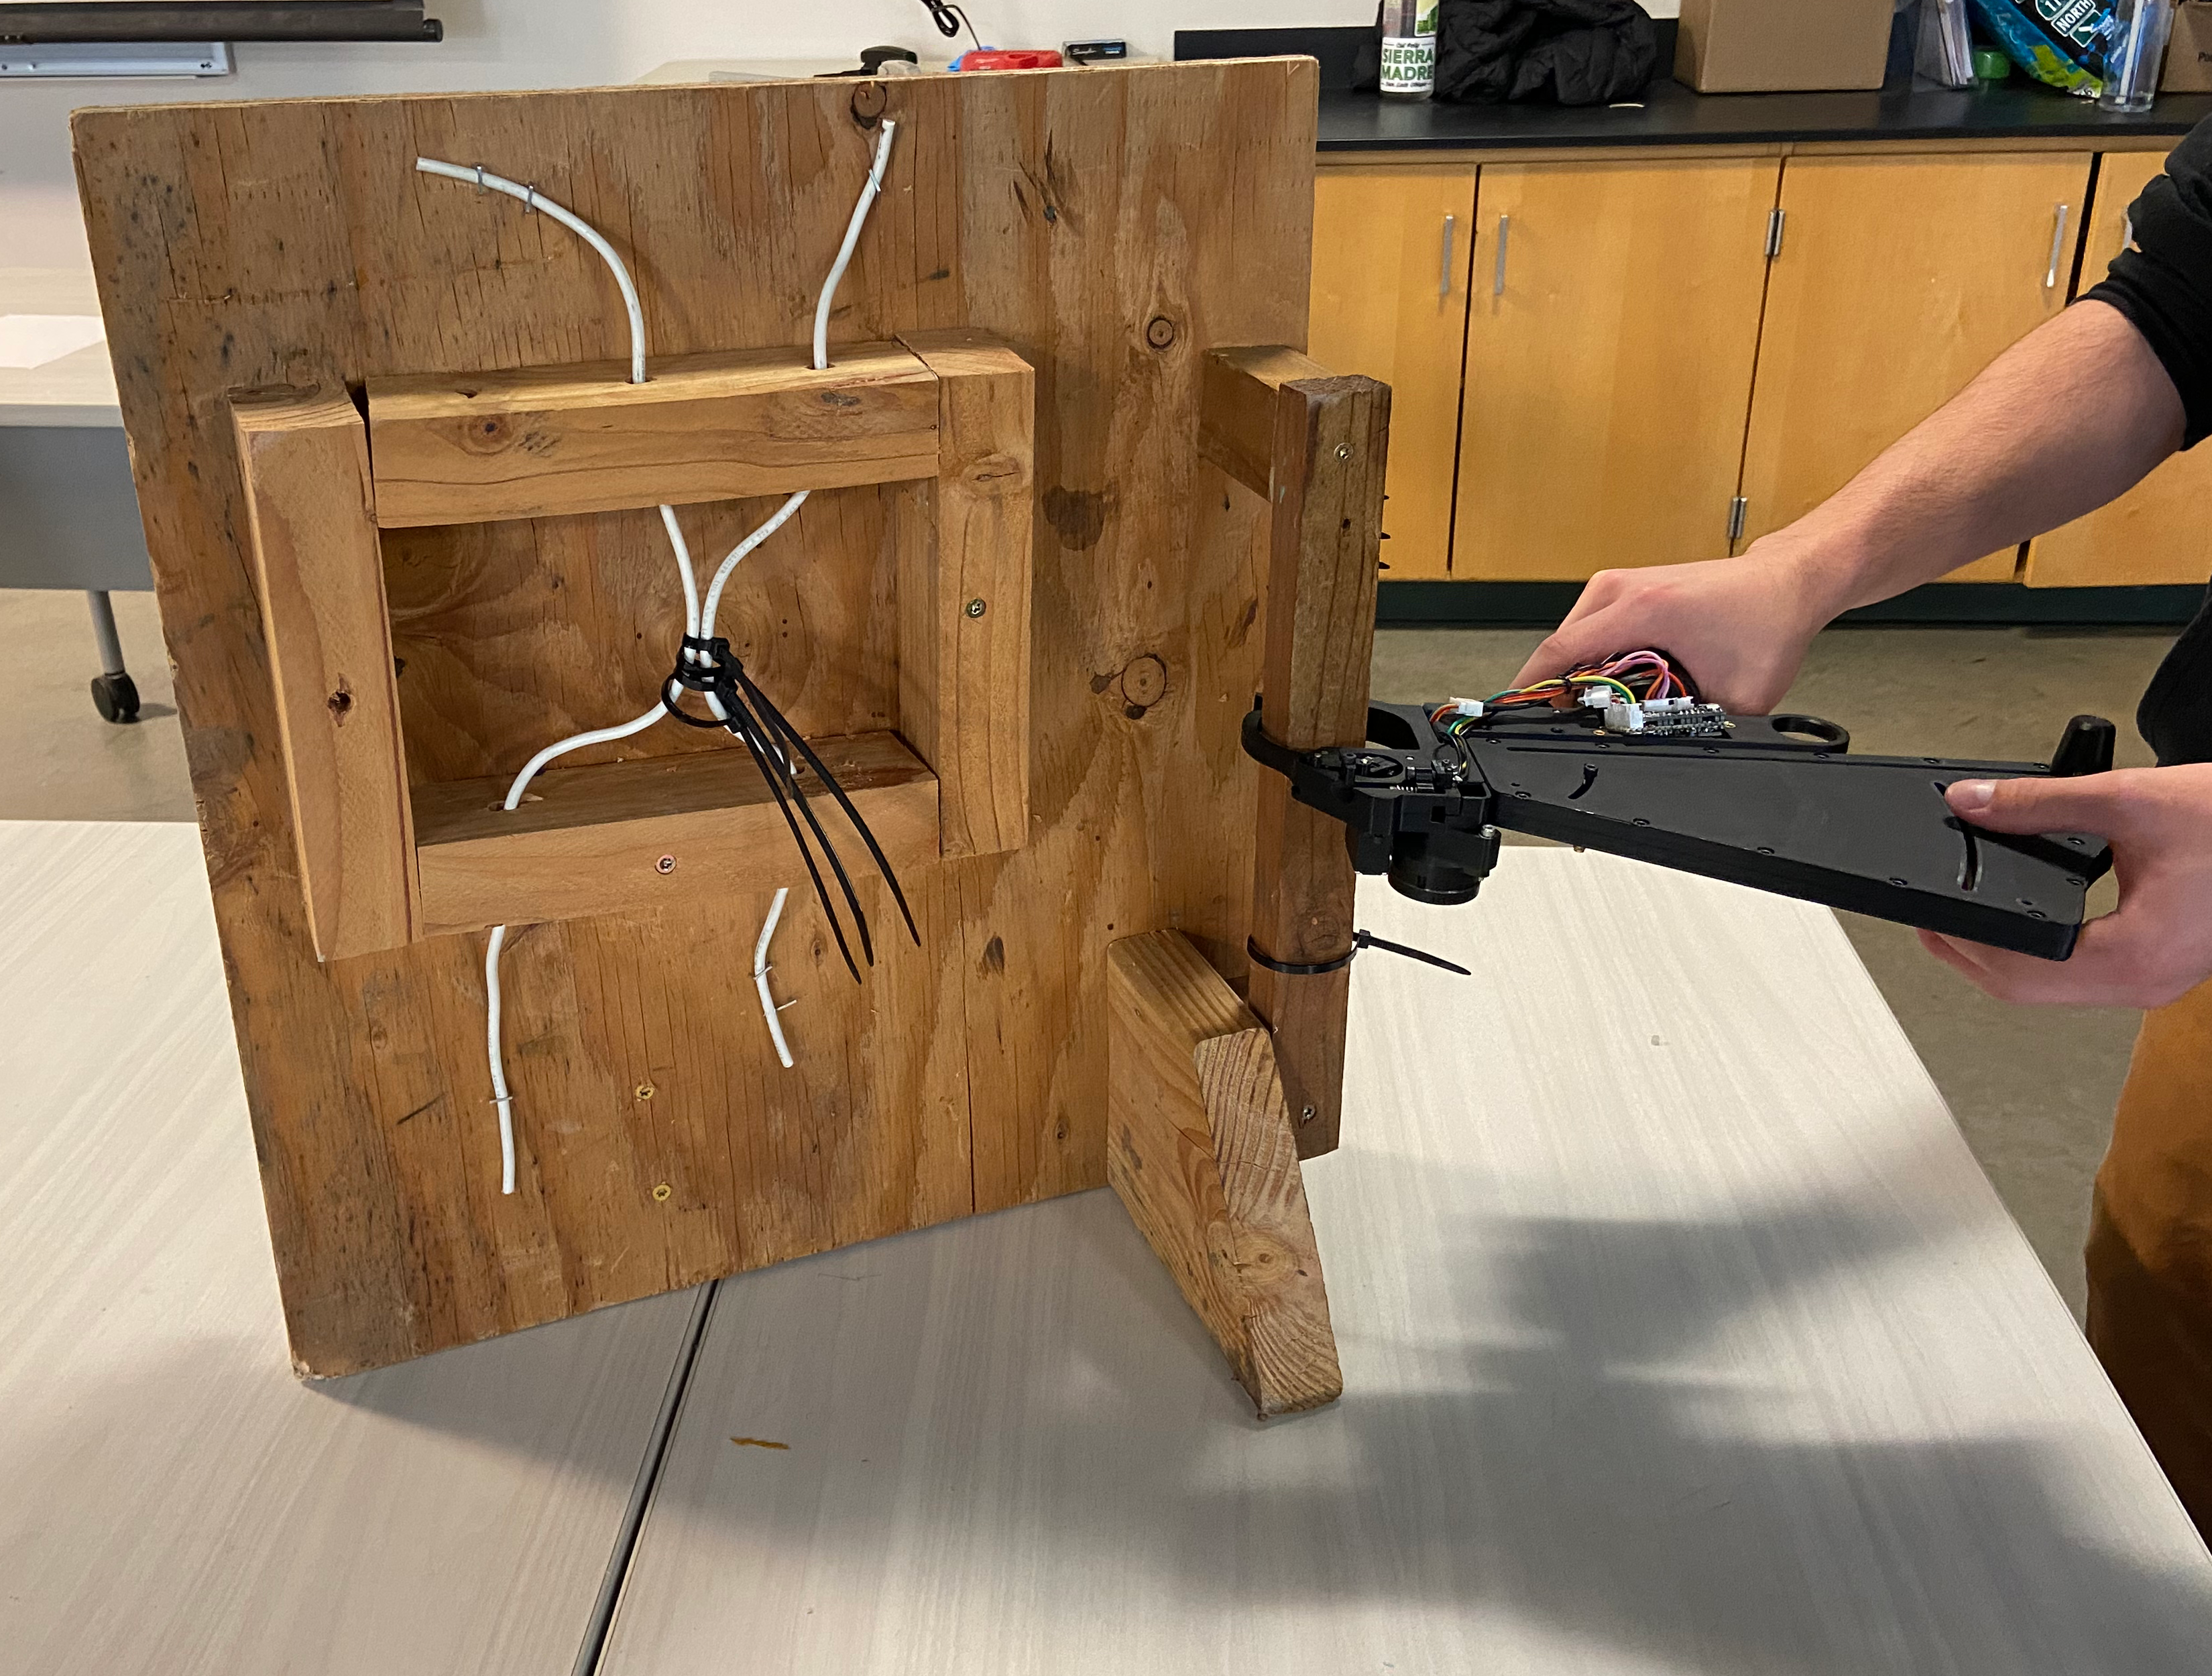
Most of our testing was done on a test stand:
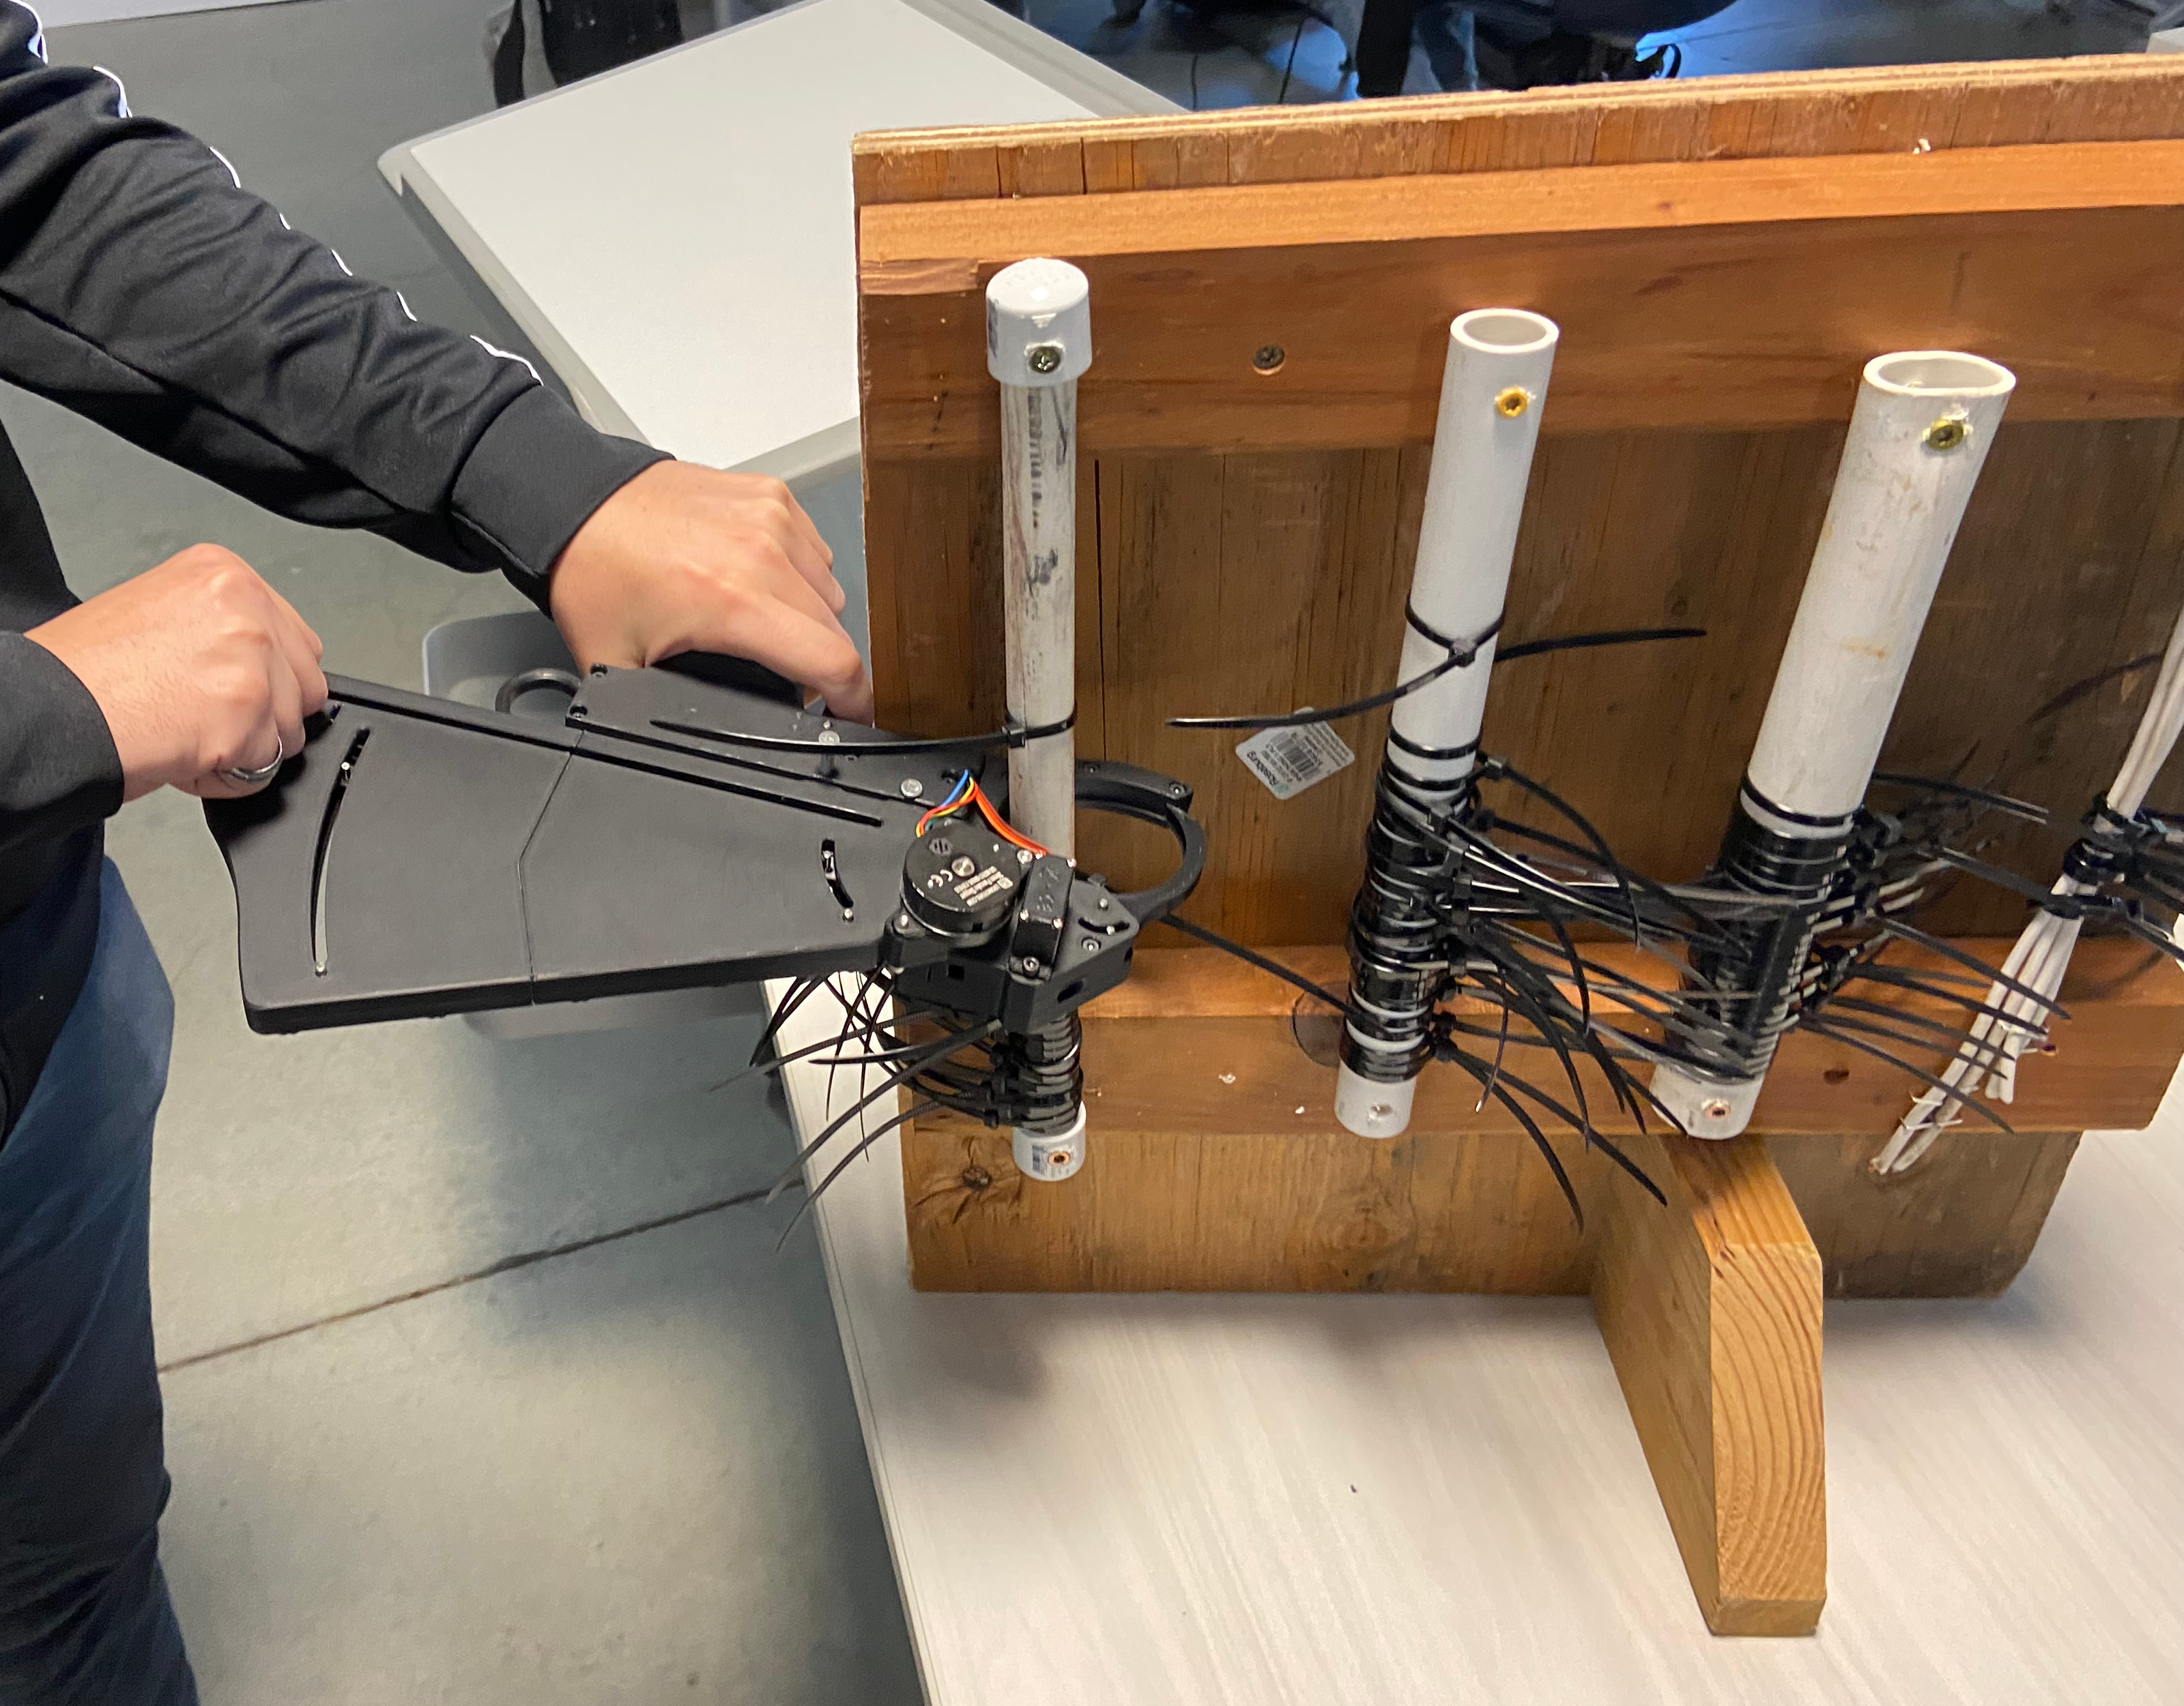
Senior Project Expo
We presented our zip tie installer at the senior project expo. In addition to explaining our device, we walked attendees through the process of using it to install a zip tie. All but around 5 of the zip ties on the test stand shown below were installed that day by people attending the expo: